What's inside a Business Central Configuration Package
Tracking content of a Business Central configuration package can help to ensure the packaged data and its setup as per your expectation. Here is a way to do it with some code snippets for process automation.


The most common way of creating validation data for Business Central is entering the data manually and then creating a (RapidStart) Configuration Package to export the created data and import it into another application environment. There are many articles and blog posts on how to use configuration packages and this blog post goes beyond that.
Configuration packages are a powerful tool and the data import is a fairly simple process (depending on the setup, of course). There is one challenge I faced, however, while automating a Business Central environment creation - tracking configuration package content. After the package is exported, it's hard to say whether it has all what you would expect it to have.
RapidStart file content
If we look at the standard source code for package export, the data is processed as an XML document (codeunit 8614 "Config. XML Exchange") and then compressed using the GZip format (codeunit 8619 "Config. Pckg. Compression Mgt."). That means we should be able to change the .rapidstart extension of the exported file to .gz and use an archiver software like 7-Zip to get the content. In my case, the contained file did not have an extension, therefore, once the file is decompressed, the result file extension needed to be specified as .xml to open it with a default viewer. That's it, a configuration package is essentially an archived XML file changes of which we can track as any text file.
Showcase scenario
Let's do a simple exercise that will show how the changes can be reviewed. Imagine that we develop a Business Central application extension. To streamline demonstration of our extension to the end users, we need specific to our application data setup. We decided to use configuration packages to consistently recreate the required data set by importing that data on top of the standard Microsoft Cronus company validation (demo) data. One of the tables that we need our custom data for is Customer. Our initial configuration package setup might look as in the picture below.
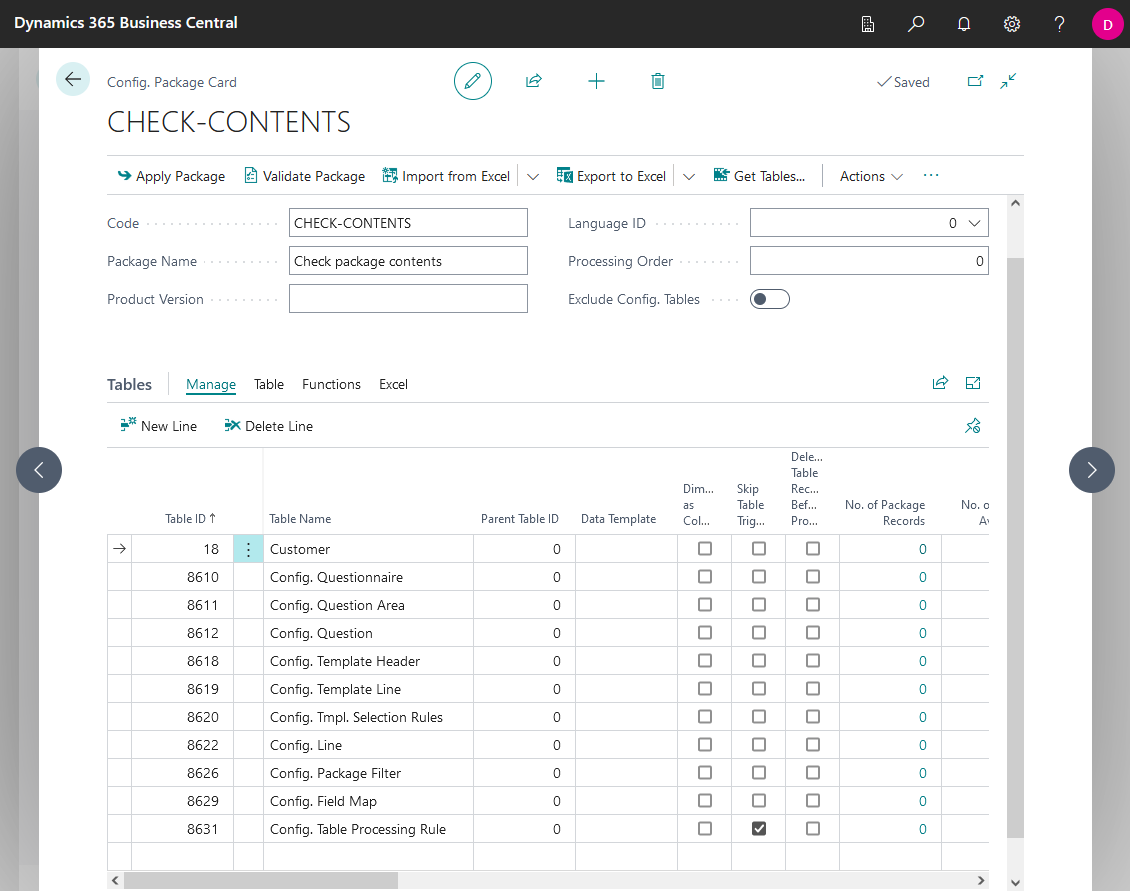
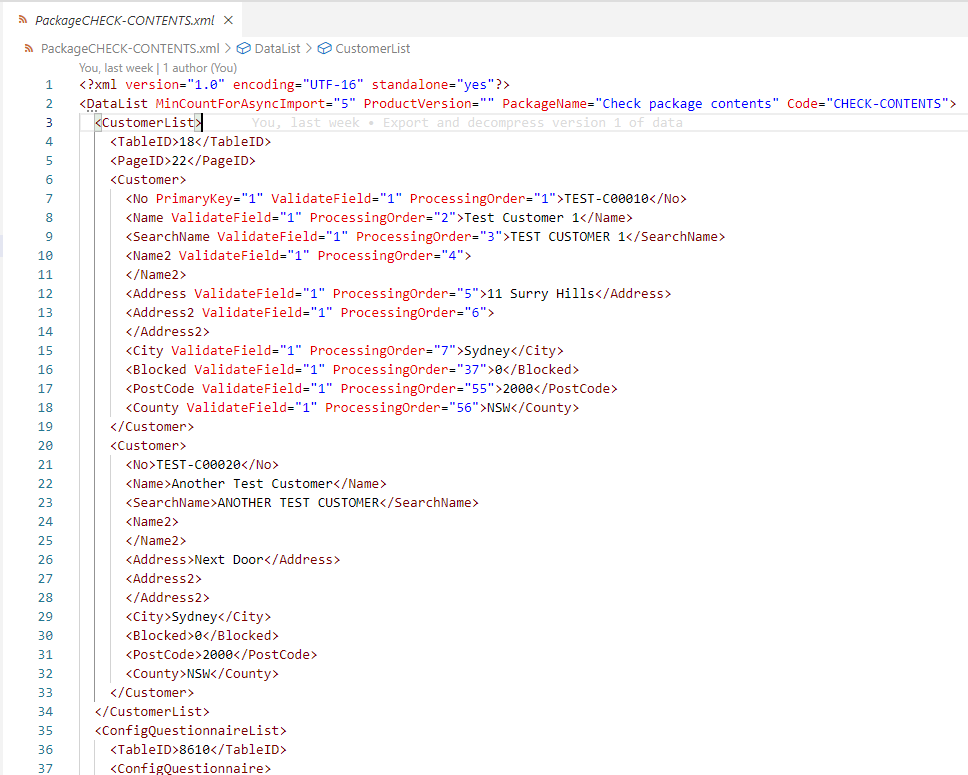
The exported and decompressed package file contains data from the listed in the configuration package tables including the setup such as information about included table filters and fields order as well as the data itself.
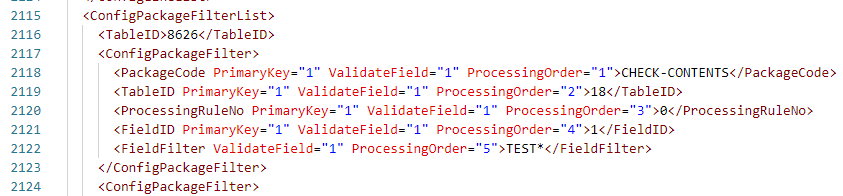
To exclude the standard Cronus data, our extension-specific Customer data is filtered by the No. field with the "TEST*" filter value, and we can see it under the ConfigPackageFilterList element of the XML package file.
We're happy with the data for now and we commit this file version along with the source code of the extension.
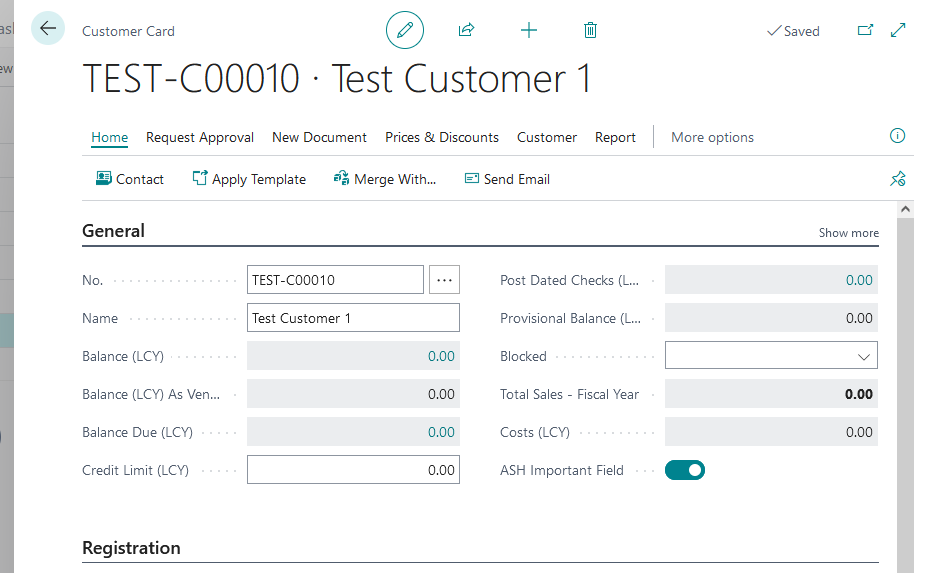
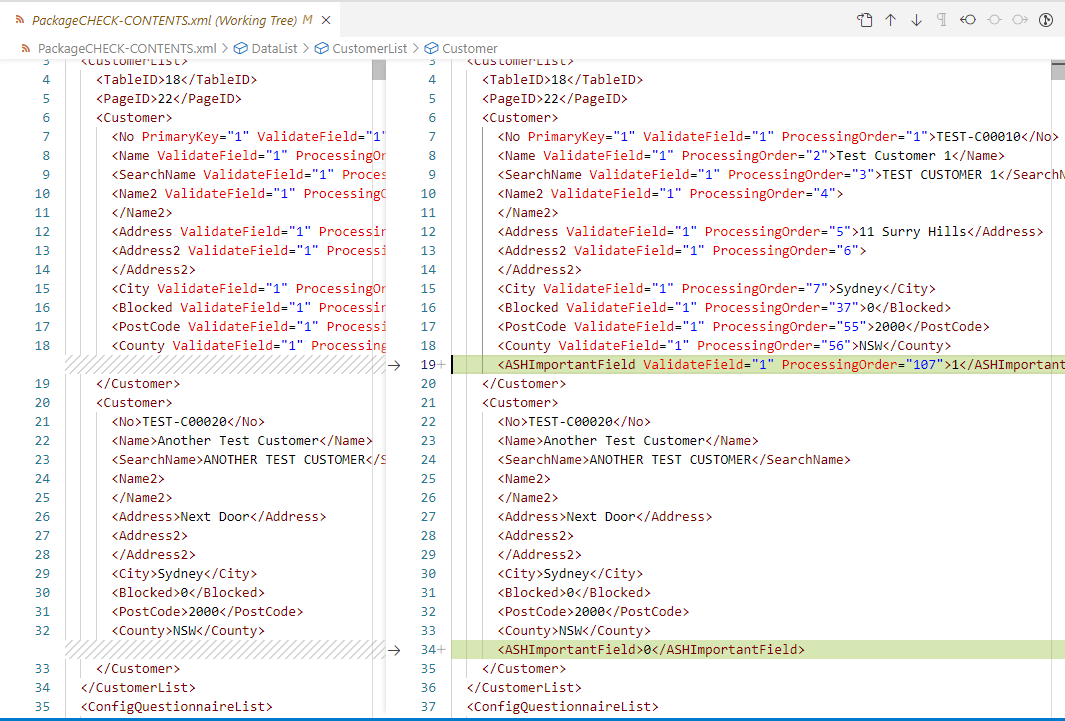
With our next useful feature, we added a custom Customer field (for this example, let's call it "ASH Important Field"), and would like to include that data into our package. A new Cronus company environment is created from scratch as usual to avoid data and configuration drift, our extension published to it and the configuration package is archived back to GZip format, imported and applied. Now we need to update the field values, add the field into the configuration package setup, and export the rapidstart file.
After going through the XML extraction process, we can clearly see the changes that a field has been added with the data from the database. We have confirmed nothing else is lost and only the expected data update is going to be committed to the source code repository.
By following this approach, every time we change the source code and the data needs an update, we track all data changes as well so that at all times the version of the application source code corresponds with the data version that we need our code to be demoed with.
Automating the process
The conversion from rapidstart to xml and back can be done with a PowerShell script. The below are the functions that can perform that.
function Convert-RapidStartFileToXmlFile {
    param(
        [Parameter(Mandatory=$true)]
        [string]$RapidStartFilePath
    )
    $filePath = Join-Path $PSScriptRoot ([System.IO.Path]::GetFileName($RapidStartFilePath)) -Resolve
    $XmlFilePath = [System.IO.Path]::ChangeExtension($filePath, "xml")
    Write-Host "Decompressing $filePath to $XmlFilePath"
    $xmlFileStream = New-Object IO.FileStream ($XmlFilePath, [System.IO.FileMode]::Create)
    $rapidstartFileStream = New-Object IO.FileStream ($filePath, [System.IO.FileMode]::Open, [IO.FileAccess]::Read)
    $gzipStream = New-Object IO.Compression.GzipStream ($rapidstartFileStream, [IO.Compression.CompressionMode]::Decompress)

    try {
        $gzipStream.CopyTo($xmlFileStream)
    }
    finally {
        $gzipStream.Close()
        $rapidstartFileStream.Close()
        $xmlFileStream.Close()
    }
}

function Convert-XmlFileToRapidStartFile {
    param(
        [Parameter(Mandatory=$true)]
        [string]$XmlFilePath
    )
    $filePath = Join-Path $PSScriptRoot ([System.IO.Path]::GetFileName($XmlFilePath)) -Resolve
    $RapidStartFilePath = [System.IO.Path]::ChangeExtension([System.IO.Path]::GetFullPath($filePath), "rapidstart")
    Write-Host "Compressing $filePath to $RapidStartFilePath"
    $xmlFileStream = New-Object IO.FileStream ($filePath, [IO.FileMode]::Open, [IO.FileAccess]::Read)
    $rapidstartFileStream = New-Object IO.FileStream ($RapidStartFilePath, [System.IO.FileMode]::Create)
    $gzipStream = New-Object IO.Compression.GzipStream ($rapidstartFileStream, [IO.Compression.CompressionMode]::Compress)

    try {
        $xmlFileStream.CopyTo($gzipStream)
    }
    finally {
        $xmlFileStream.Close()
        $gzipStream.Close()
        $rapidstartFileStream.Close()
    }
}The below are examples of how those functions can be called.
# Example of getting the contents of a RapidStart file:
Convert-RapidStartFileToXmlFile -RapidStartFilePath .\PackageCHECK-CONTENTS.rapidstart

# Example of creating a RapidStart file from an xml file:
Convert-XmlFileToRapidStartFile -XmlFilePath .\PackageCHECK-CONTENTS.xmlAfter the XML file that we track changes for is converted to a rapidstart file, it can be imported back into a Business Central environment. There is no need to track the original rapidstart file as we always can create it from the XML file.
The PowerShell scripts are helpful in particular if we use some kind of continuous integration (CI) pipeline which uses Docker containers to run automated tests. For example, if your source code repository is set up with AL-Go for GitHub, the ImportTestDataInBcContainer can be customized so that the Convert-XmlFileToRapidStartFile function is run to create the rapidstart file and then the UploadImportAndApply-ConfigPackageInBcContainer is called with the created file path as a parameter.
Summary
We have found out that a Business Central configuration package is an archived XML file and we can track its history of modifications and still be able to import it back to a newly created environment either manually or as part of an automated process using PowerShell scripts. The downside of this approach that needs to be considered is that the extracted XML file is significantly bigger than the archived configuration package.
The source code for this blog post can be found at https://github.com/ashirokikh/ashirokikh.com