Walkthrough: AL Extension on Docker Desktop
Follow this detailed guide to set up your first Business Central development environment with BC Container Helper and publish an AL extension to it.


Spending time efficiently while working is mainly about having proper tools. If you're a software engineer, there are many points why Docker is worth investing your time. The main argument for me as a D365 Business Central (BC) developer is that you can keep your computer clean of BC installations and work with multiple versions of the system at the same time!
This post is for you if you still think that Business Central (BC) development using Docker is something difficult to start with. Freddy Kristiansen (Microsoft) with help of other contributors has done a great job to make it easier for everyone to include this amazing tool into our collection by introducing a BC Container Helper.
If you are teamed up with an end user and don’t have the Microsoft Partner portal access, using Docker is a very liberating experience with regard to being able to play with the source code of multiple application versions. Have you ever wanted to quickly get an original BC object without customization, or to see how the next version looks like? Now it can be done with spinning up a local BC environment with the version.
Convinced to give it a try? Let's get to it!
Prerequisites
The prerequisites for this walk-through are as follows:
- Windows 10 Enterprise, Pro, or Education (Hyper-V virtualisation is required for Docker on Windows).
- Good unlimited Internet connection.
The steps below were run on a Virtual Machine (VM) based from the Windows 10 dev environment image to ensure everything is done on a clean machine. See the VM specific extra steps below if you use a VM.
Getting Docker Desktop
When I try to search for Docker, a popular search engine points me at https://hub.docker.com/editions/community/docker-ce-desktop-windows for the Docker Desktop installation resources. We need the Community Edition (CE) version.
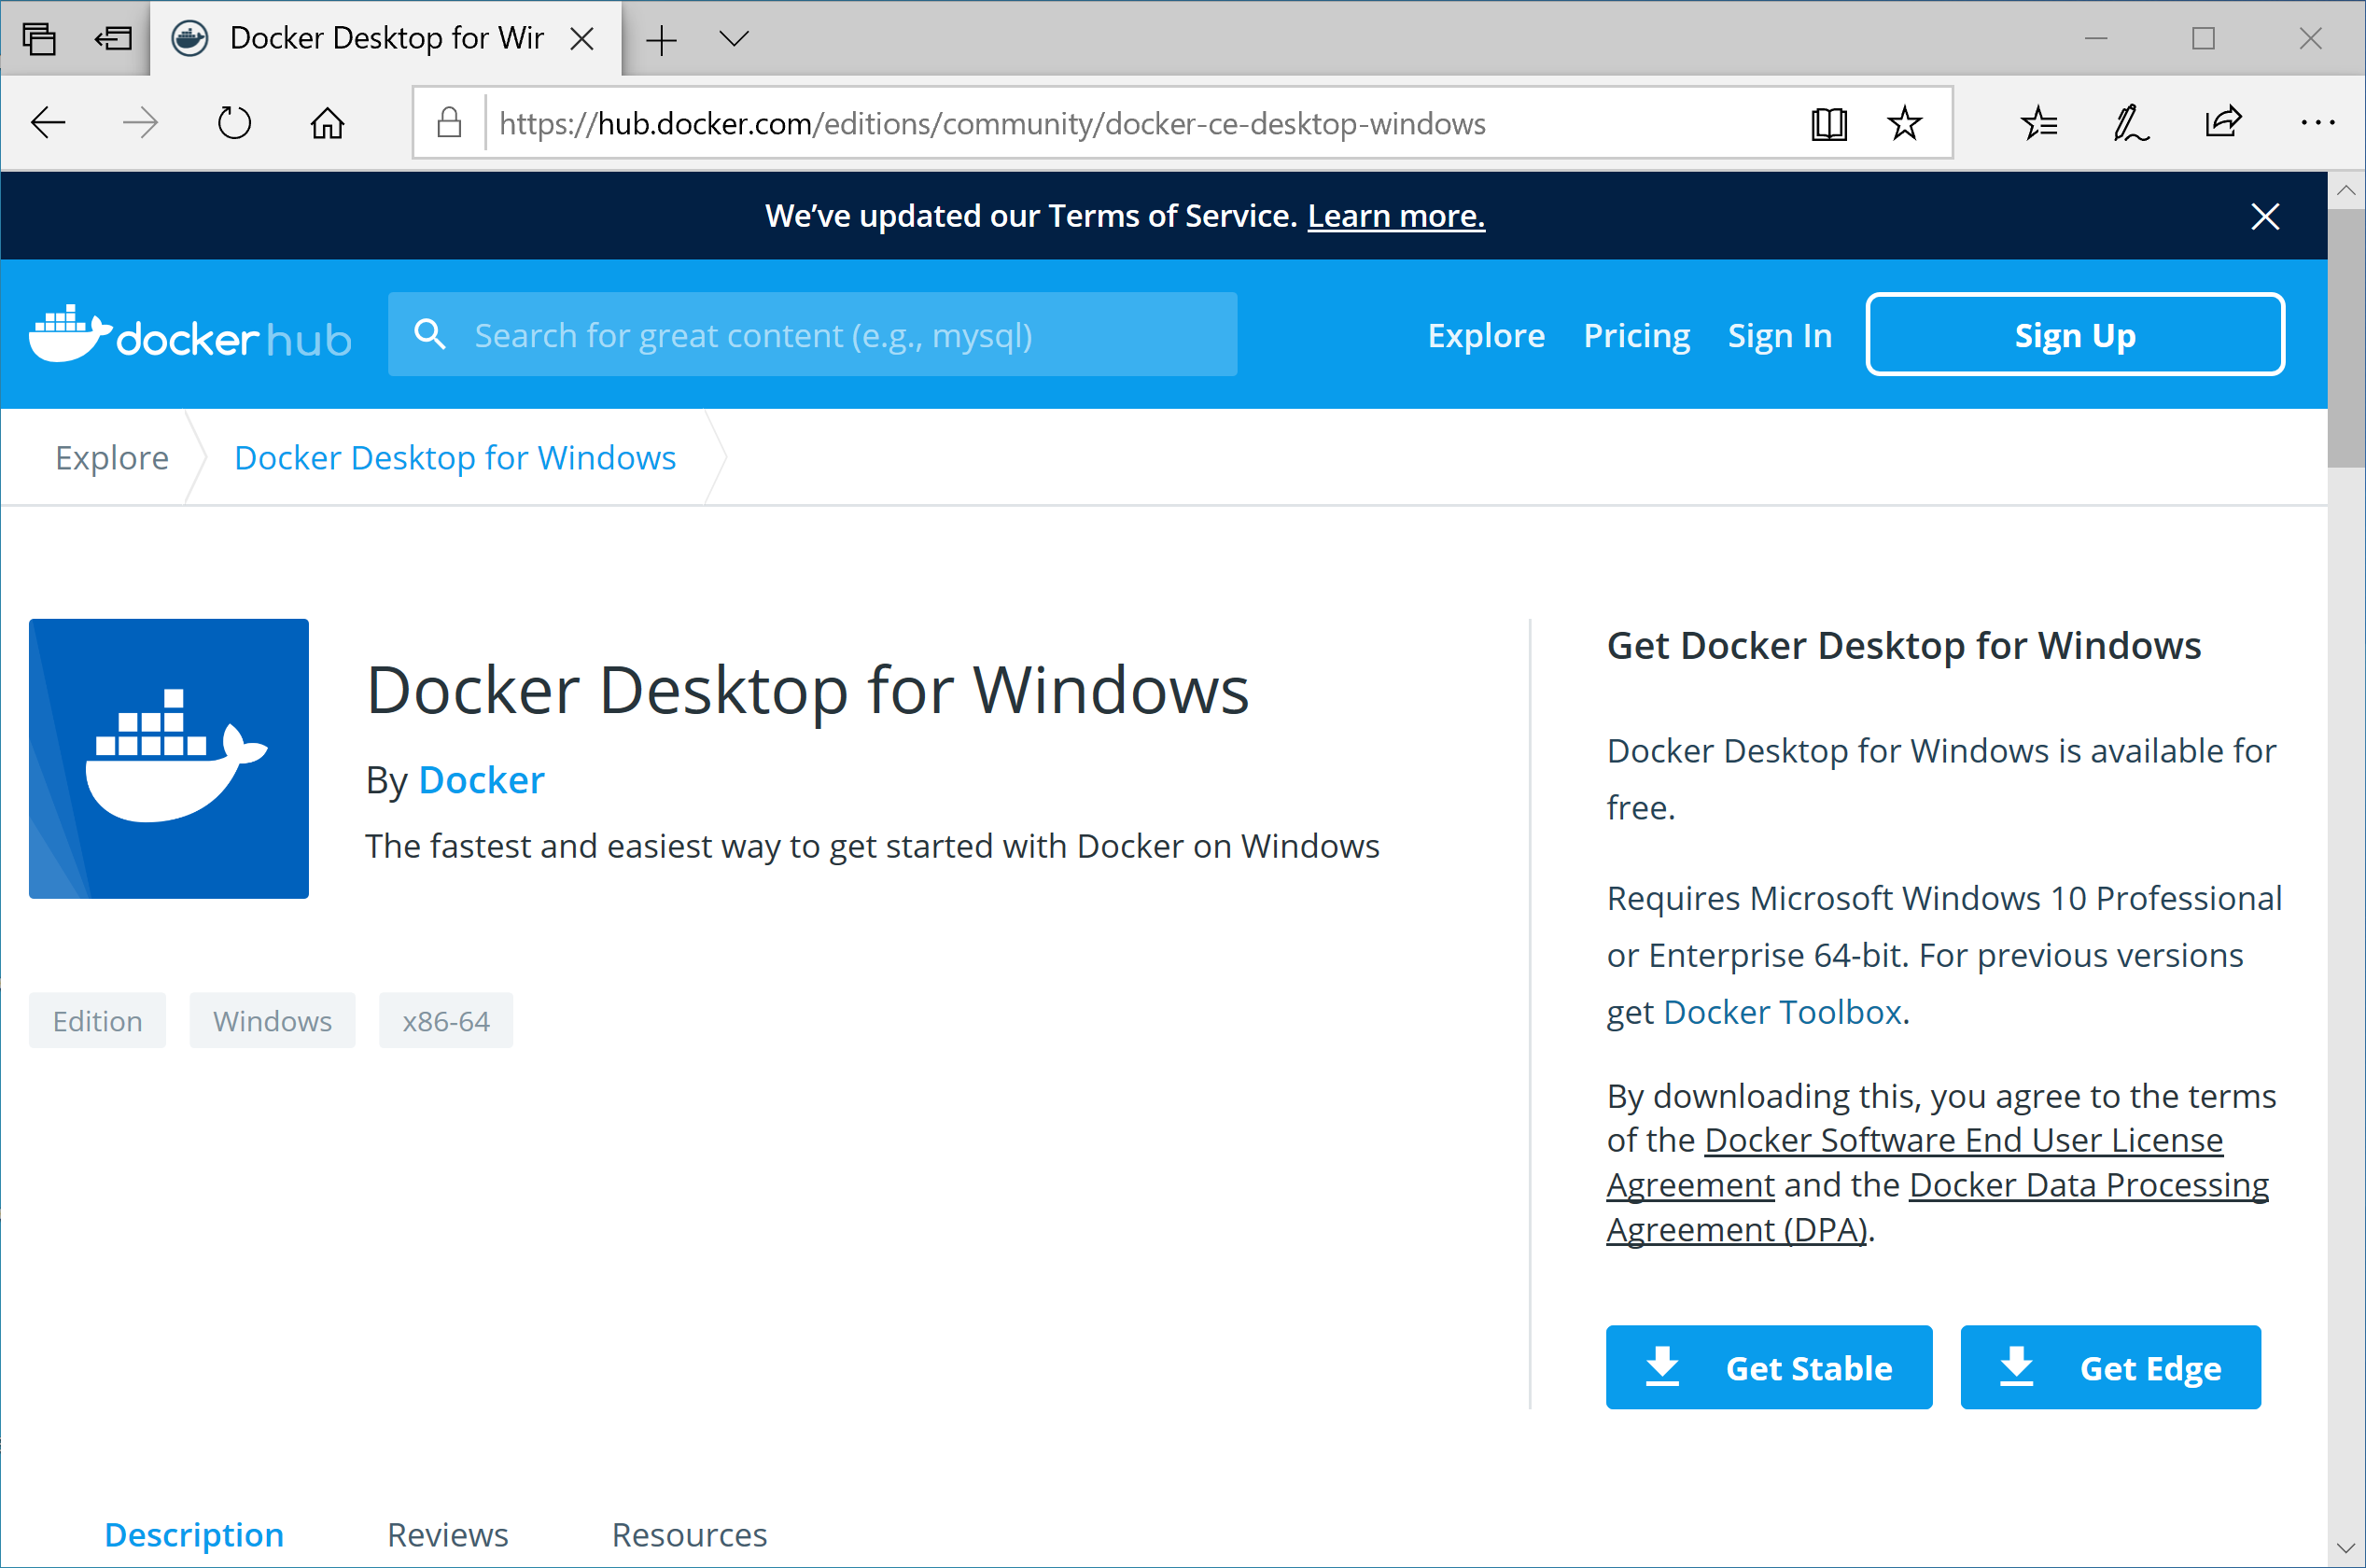
You don’t have to have a Docker account to complete this step. Download the Stable version package, run it and follow the installation instructions.
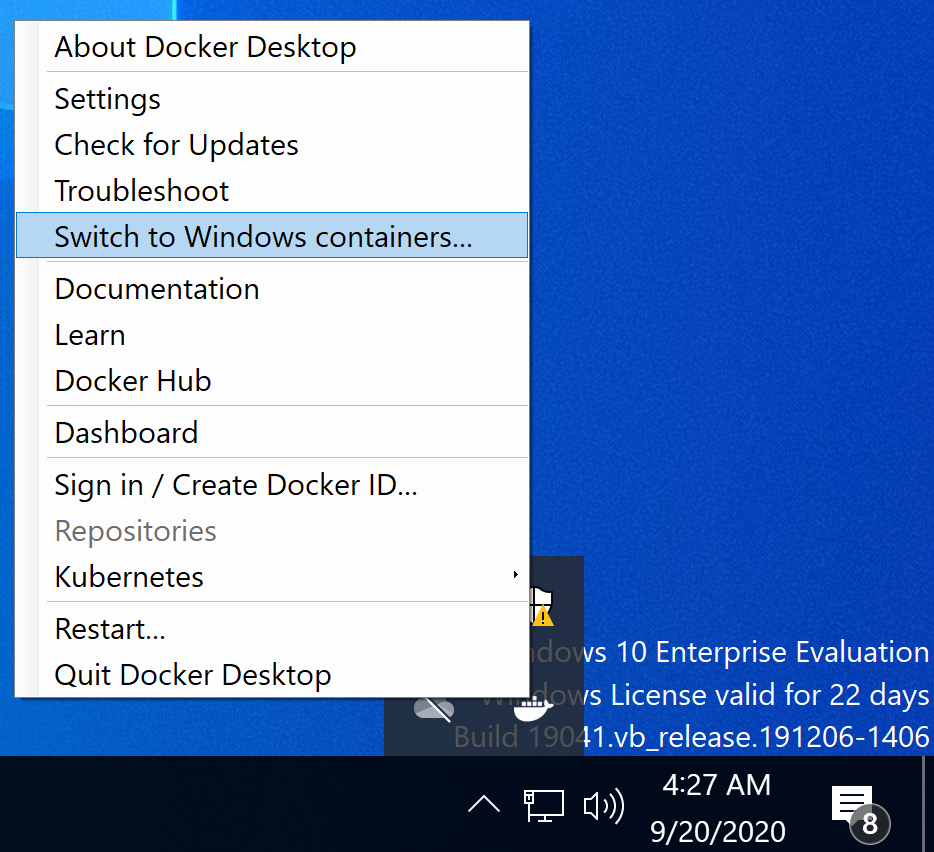
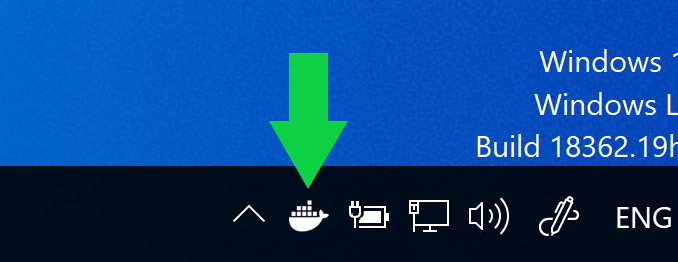
Once the installation is completed, we need to switch to Windows containers using the Docker tray icon.
If the Containers feature has not been enabled, Docker will exit for the error.
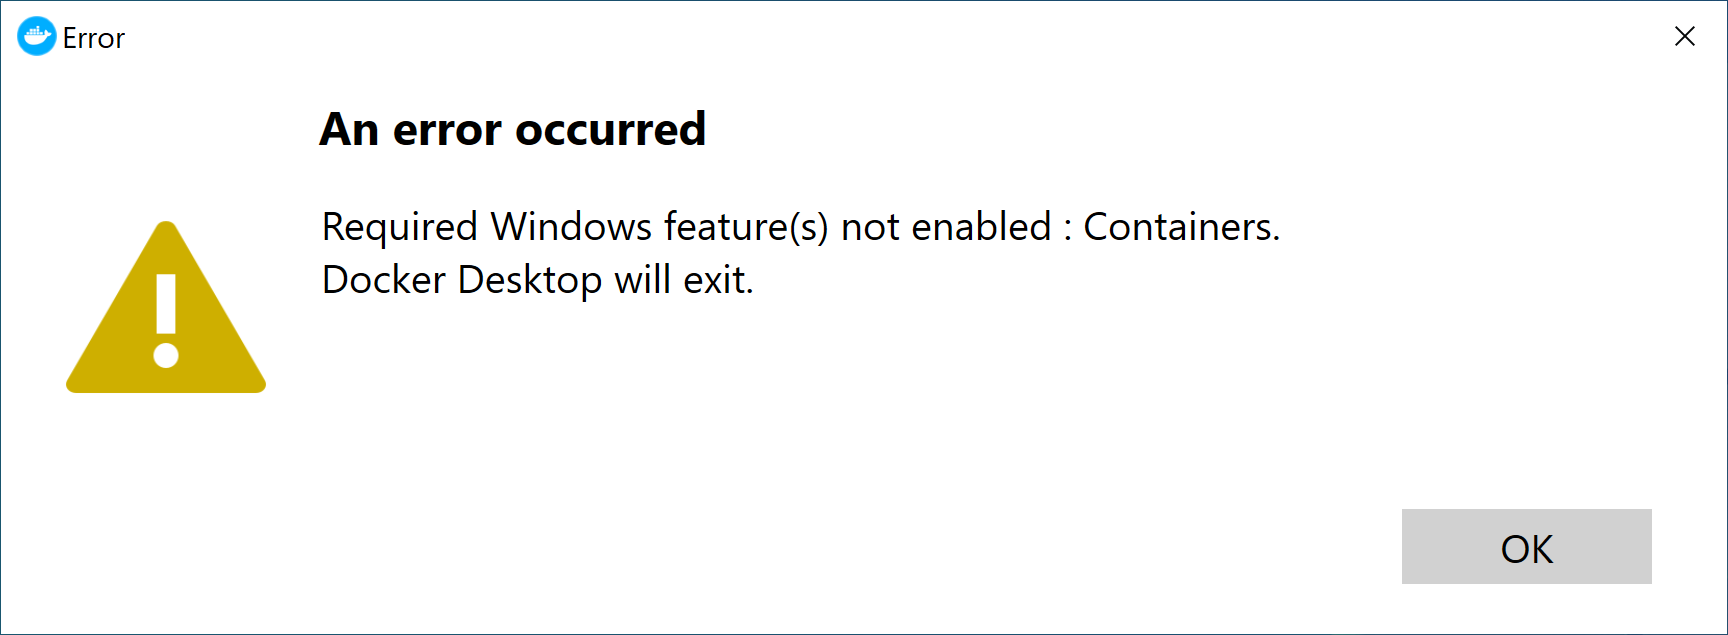
That can be fixed by running the following PowerShell command as Administrator and restarting the computer.
Enable-WindowsOptionalFeature -Online -FeatureName Containers -AllThe version of Docker Desktop that was used for this walkthrough is 2.3.0.5.
Getting BC Container Helper
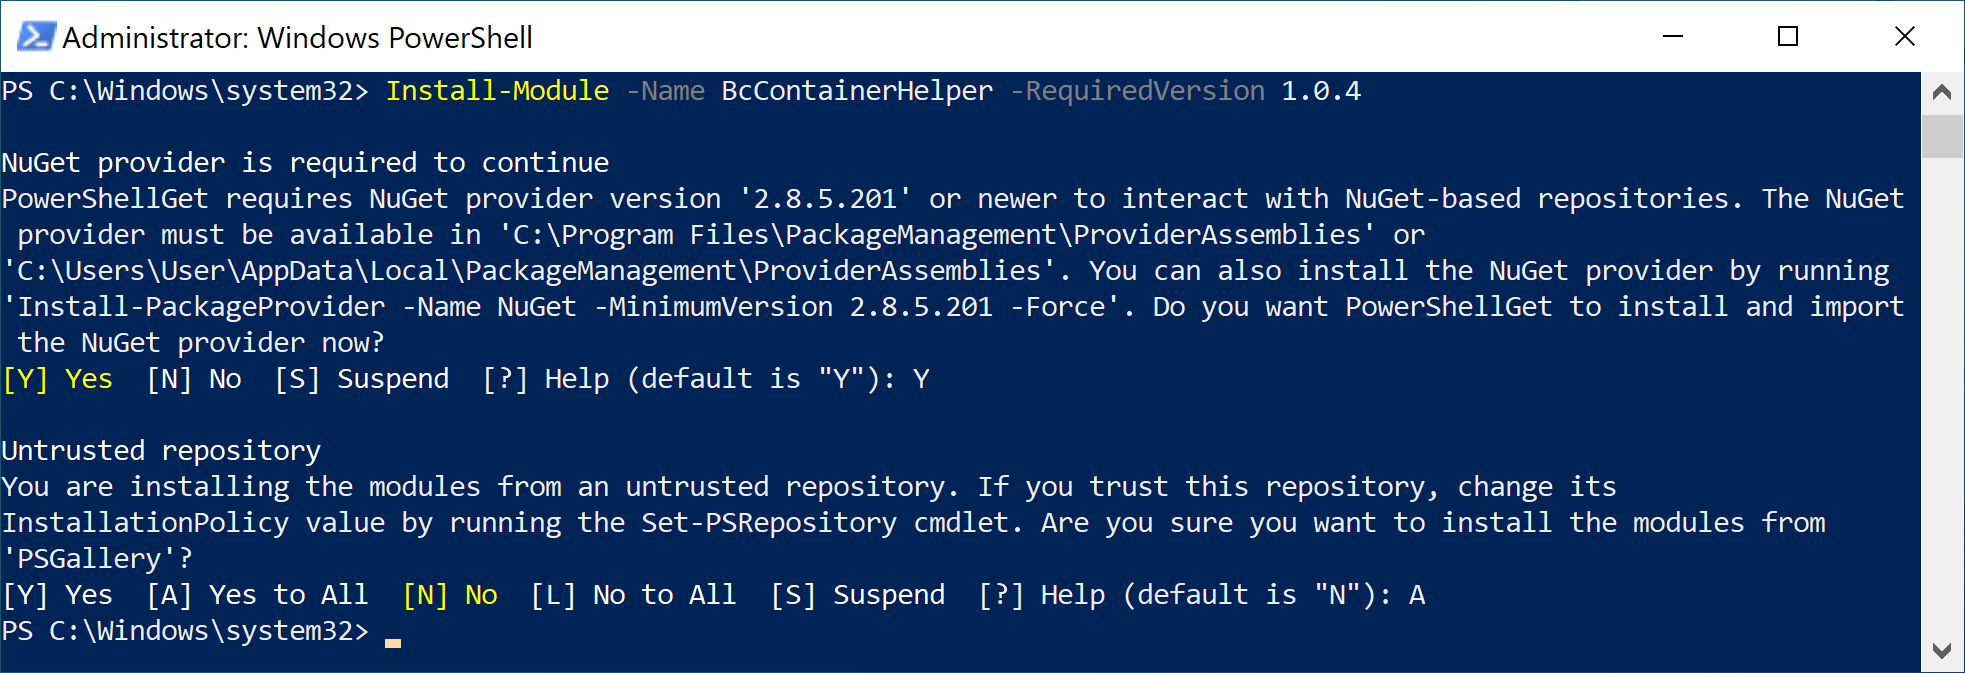
Open a PowerShell window as Administrator and paste the following command that should install the version 1.0.4 (current at the moment of writing) of the module,
Install-Module -Name BcContainerHelper -RequiredVersion 1.0.4confirming installation of the dependencies along the way. The PowerShell Gallery lists the module versions and specifying the latest stable version is usually a good idea.
Creating a Business Central Container
Ensure Docker Desktop is running and run Docker Desktop if it's not there.
Your environment might have the required execution policy. Otherwise, set it to RemoteSigned with the following command in case there are issues with running the scripts below.
Set-ExecutionPolicy RemoteSigned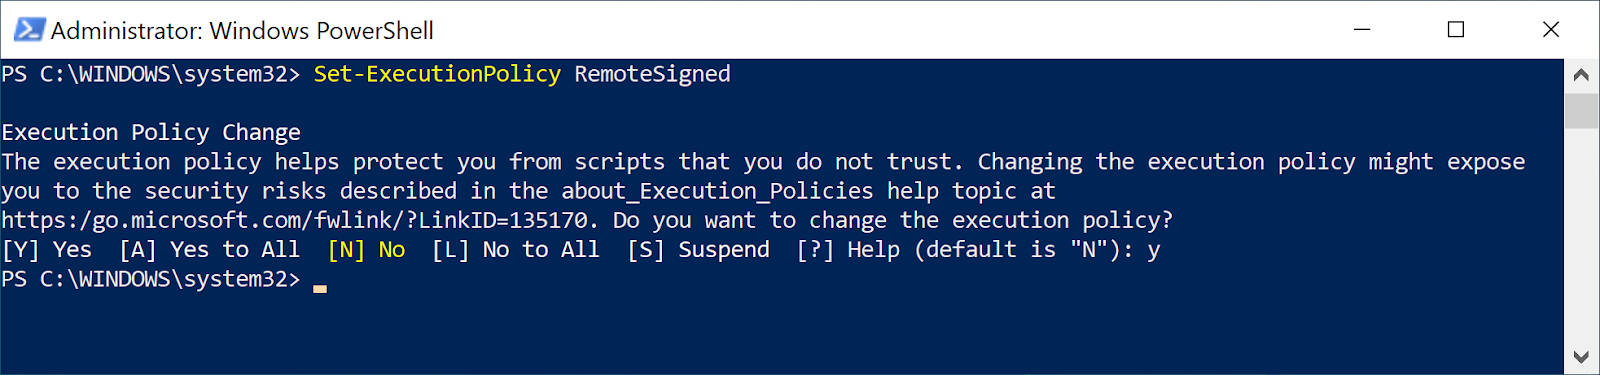
Check the module is working by typing in the following.
Write-BcContainerHelperWelcomeText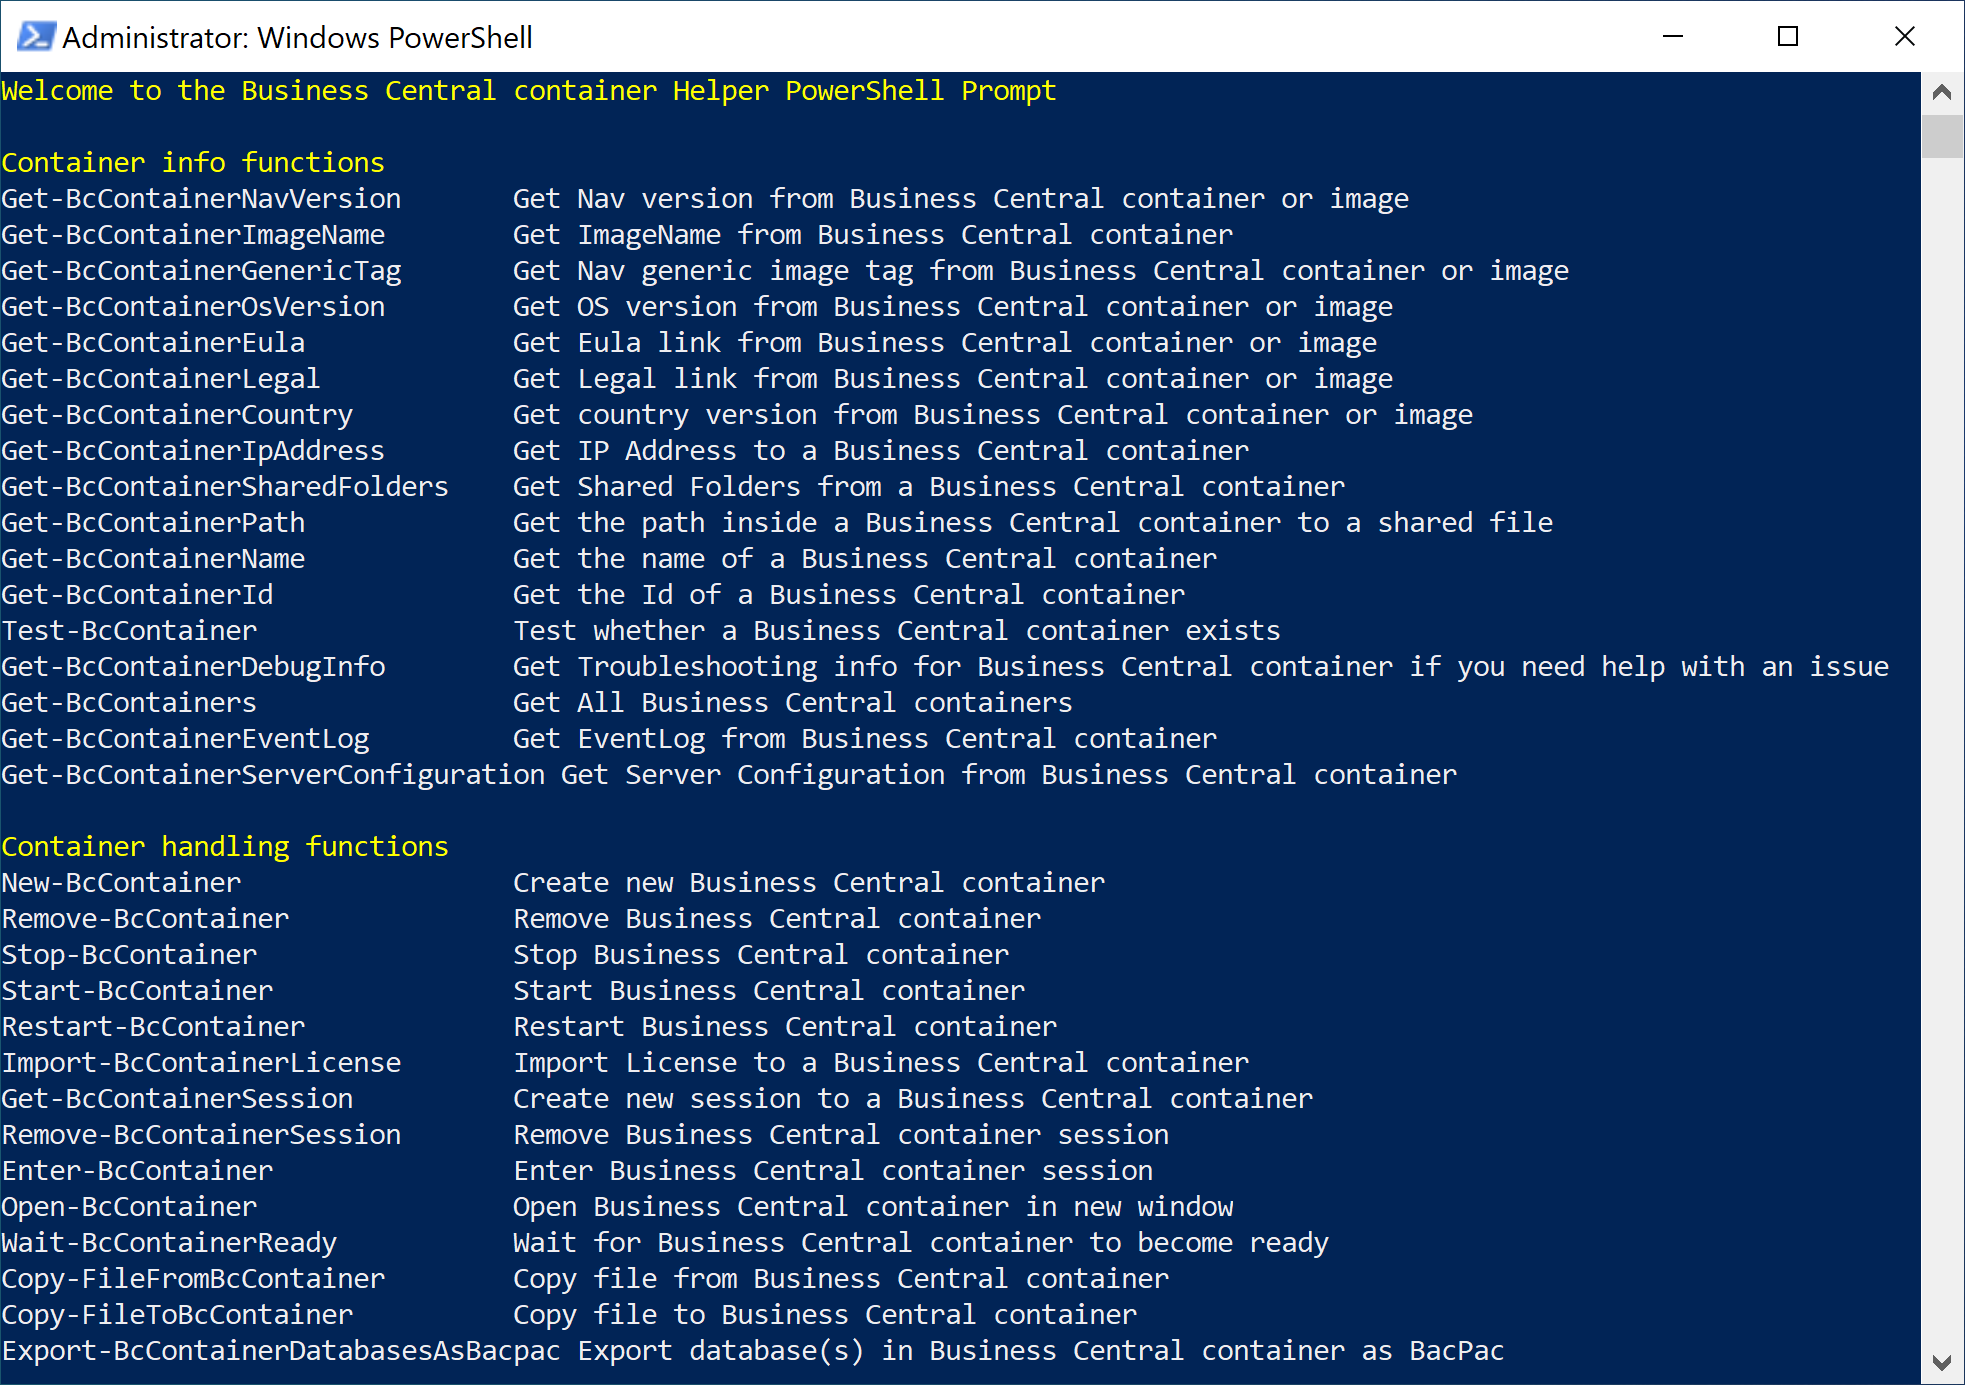
To ensure the module has the permissions required, run the command below.
Check-BcContainerHelperPermissions -Fix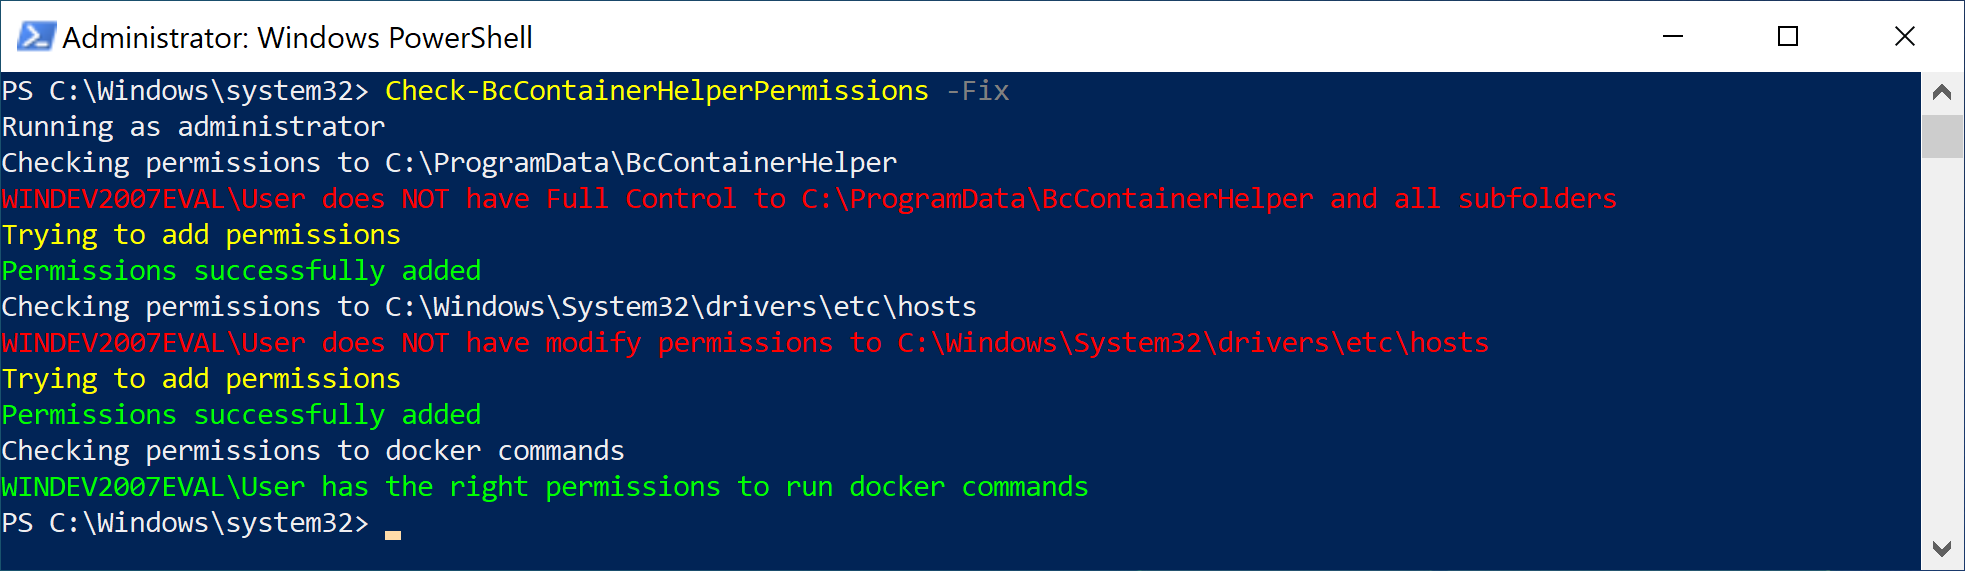
I’m using the Australian version so the image tag is au-ltsc2019. Run the following script to create the latest available on Docker Business Central (update the image tag if required). You could save it in a file with the .ps1 extension and put somewhere close. The script should not require running as Administrator.
$artifactUrl = Get-BCArtifactUrl -version 16 -country au -select Latest
$containerName = "bclts"
$authenticationType = 'NavUserPassword' # or Windows for the current AD user

Write-Host "*** Starting $containerName container creation ***" -ForegroundColor Yellow
Write-Host "Artifact URL: $artifactUrl"

if ($authenticationType -ne 'Windows'){
    $credential = get-credential -Message "Enter BC Super User credentials"
}
Measure-command {
    New-BCContainer -accept_eula `
                    -accept_outdated `
                    -containerName $containerName `
                    -artifactUrl $artifactUrl `
                    -auth $authenticationType `
                    -credential $credential `
                    -memoryLimit 10G `
                    -updateHosts `
                    -includeAL `
                    -myscripts @()
}
Enter the container administrator user credentials if you’re asked to.
Docker will start downloading the image.
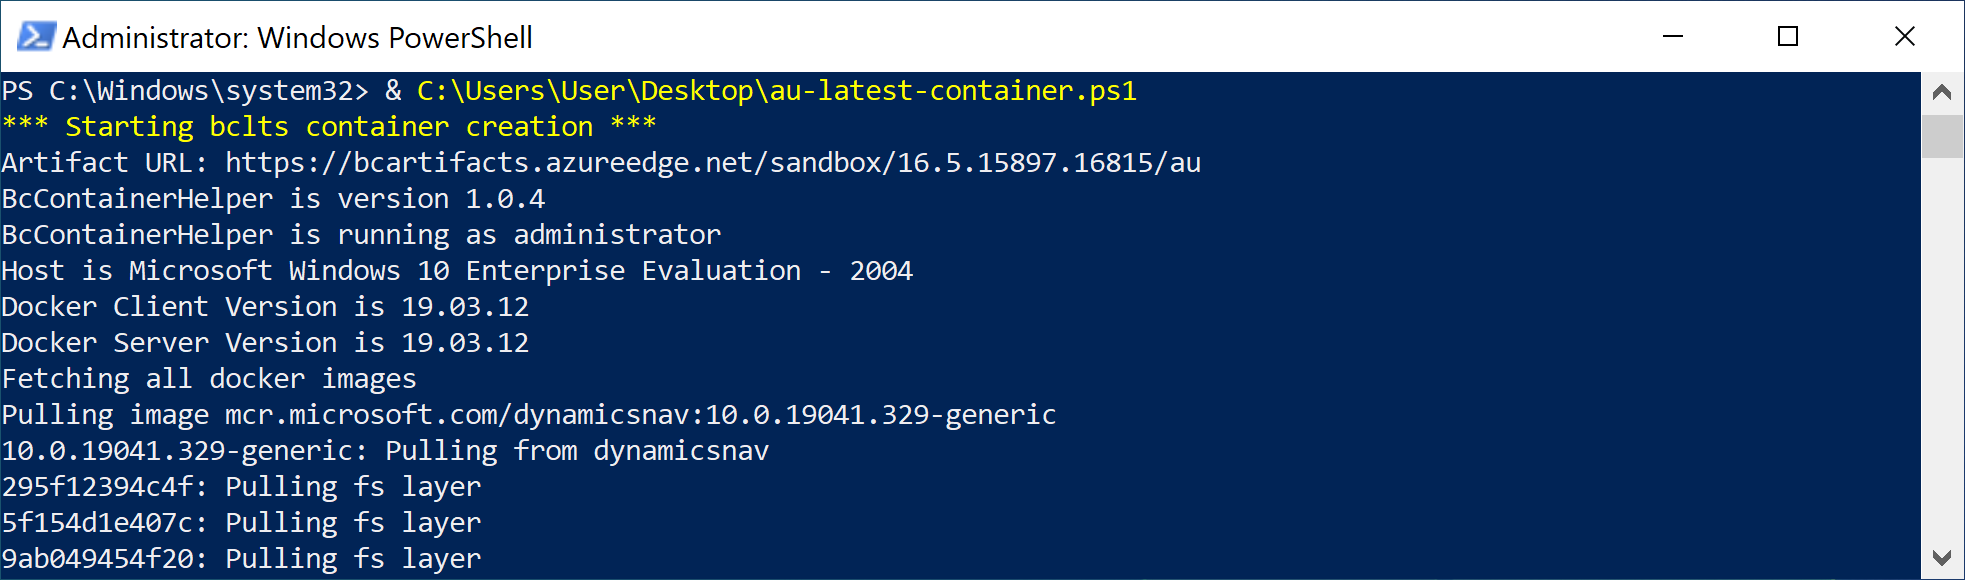
Running the script fist time will take quite a bit of time as it downloads docker images and artifacts (took ~30 minutes for me). Once it finishes, the result console look will resemble the below.
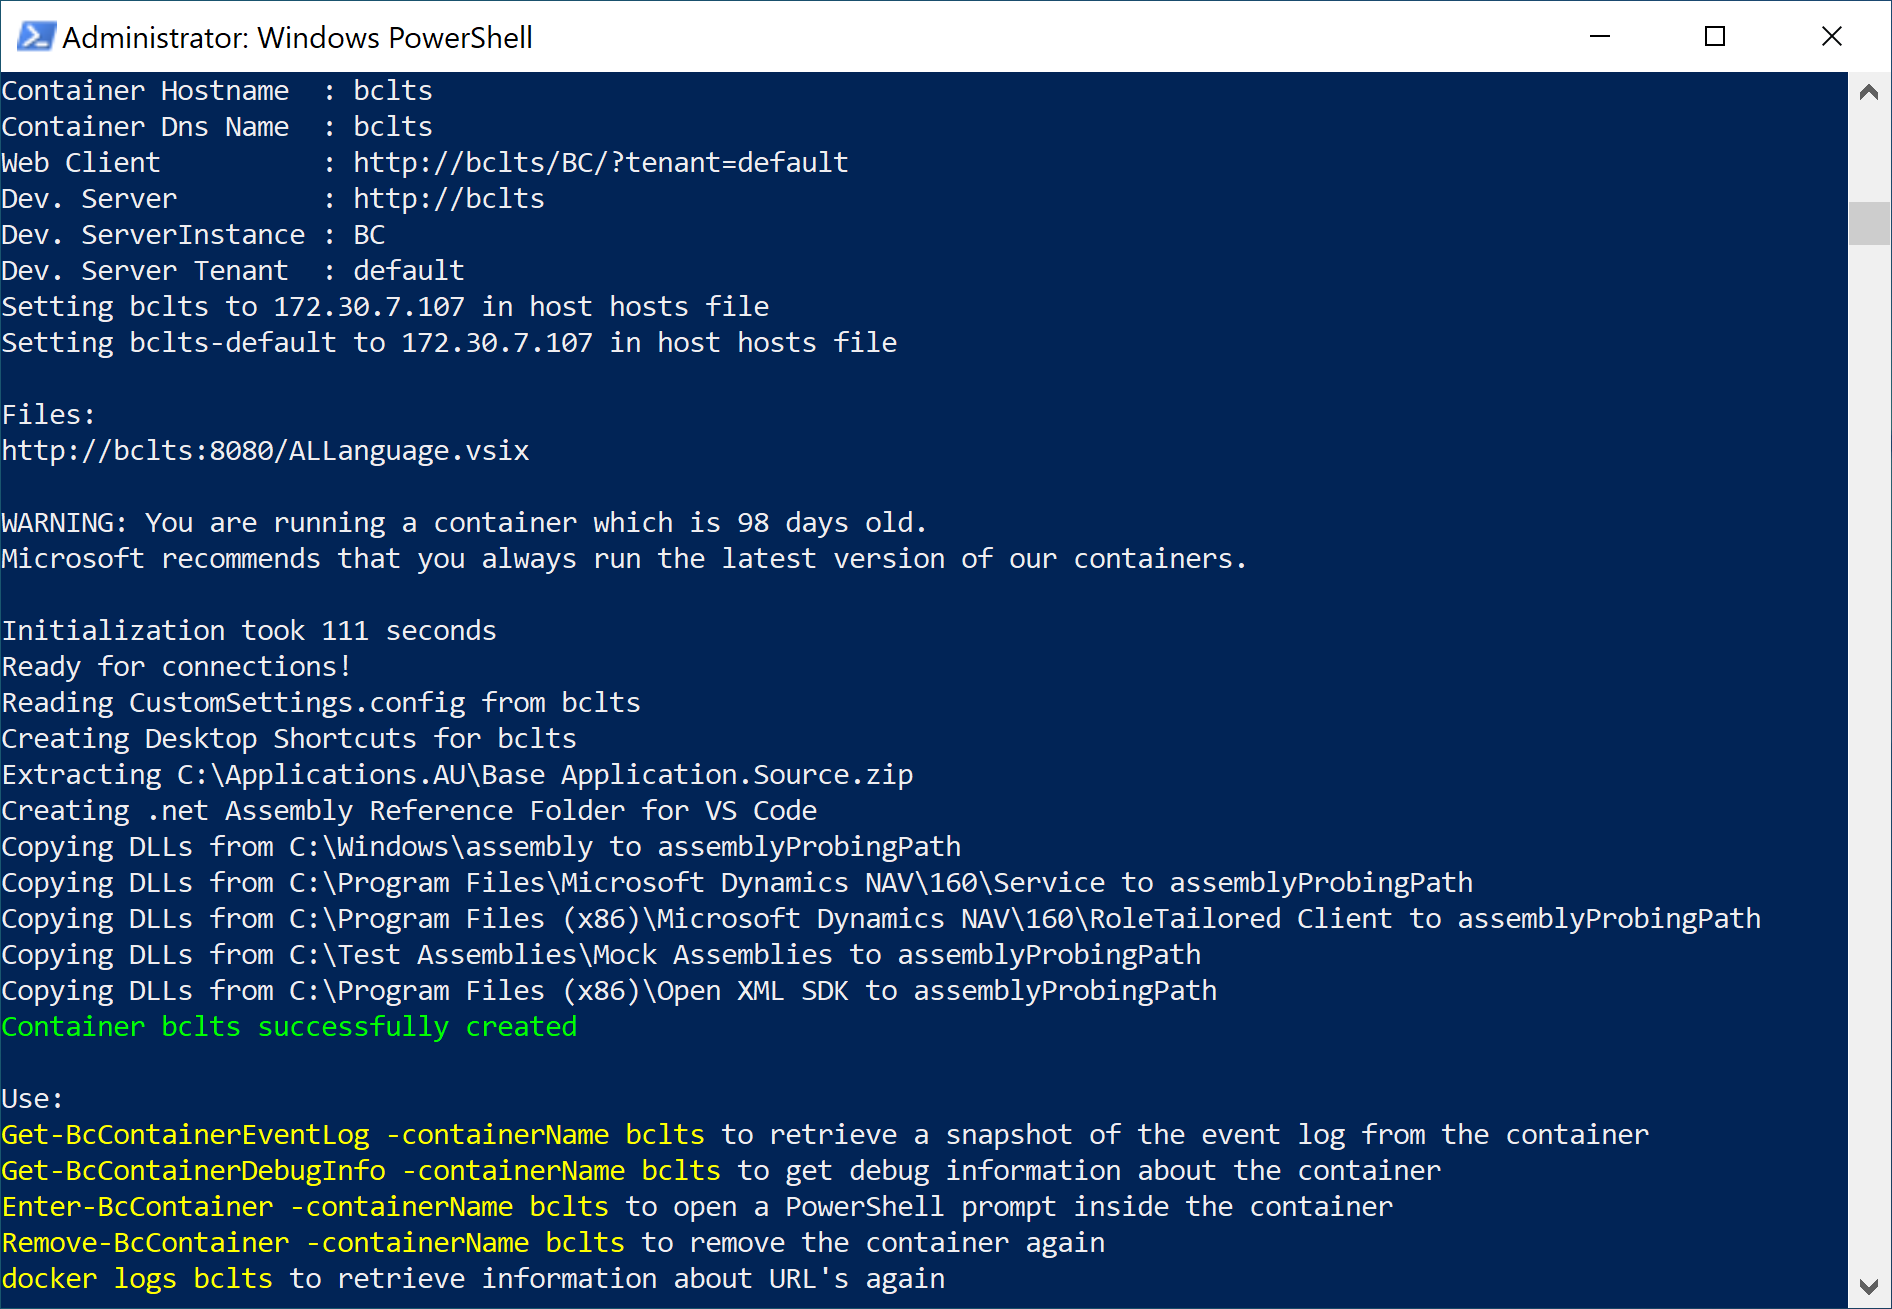
Last output lines include some useful information about the container, such as the .vsix file location that we’ll need to set up Visual Studio Code. In case the output info somehow got lost, the following command should give you enough data.
docker logs bcltsYou’ll notice some newly created shortcuts on your Desktop.
Feel free to follow the Web Client link and confirm the application is working! If you follow the naming in this post, it should be http://bclts/BC/.
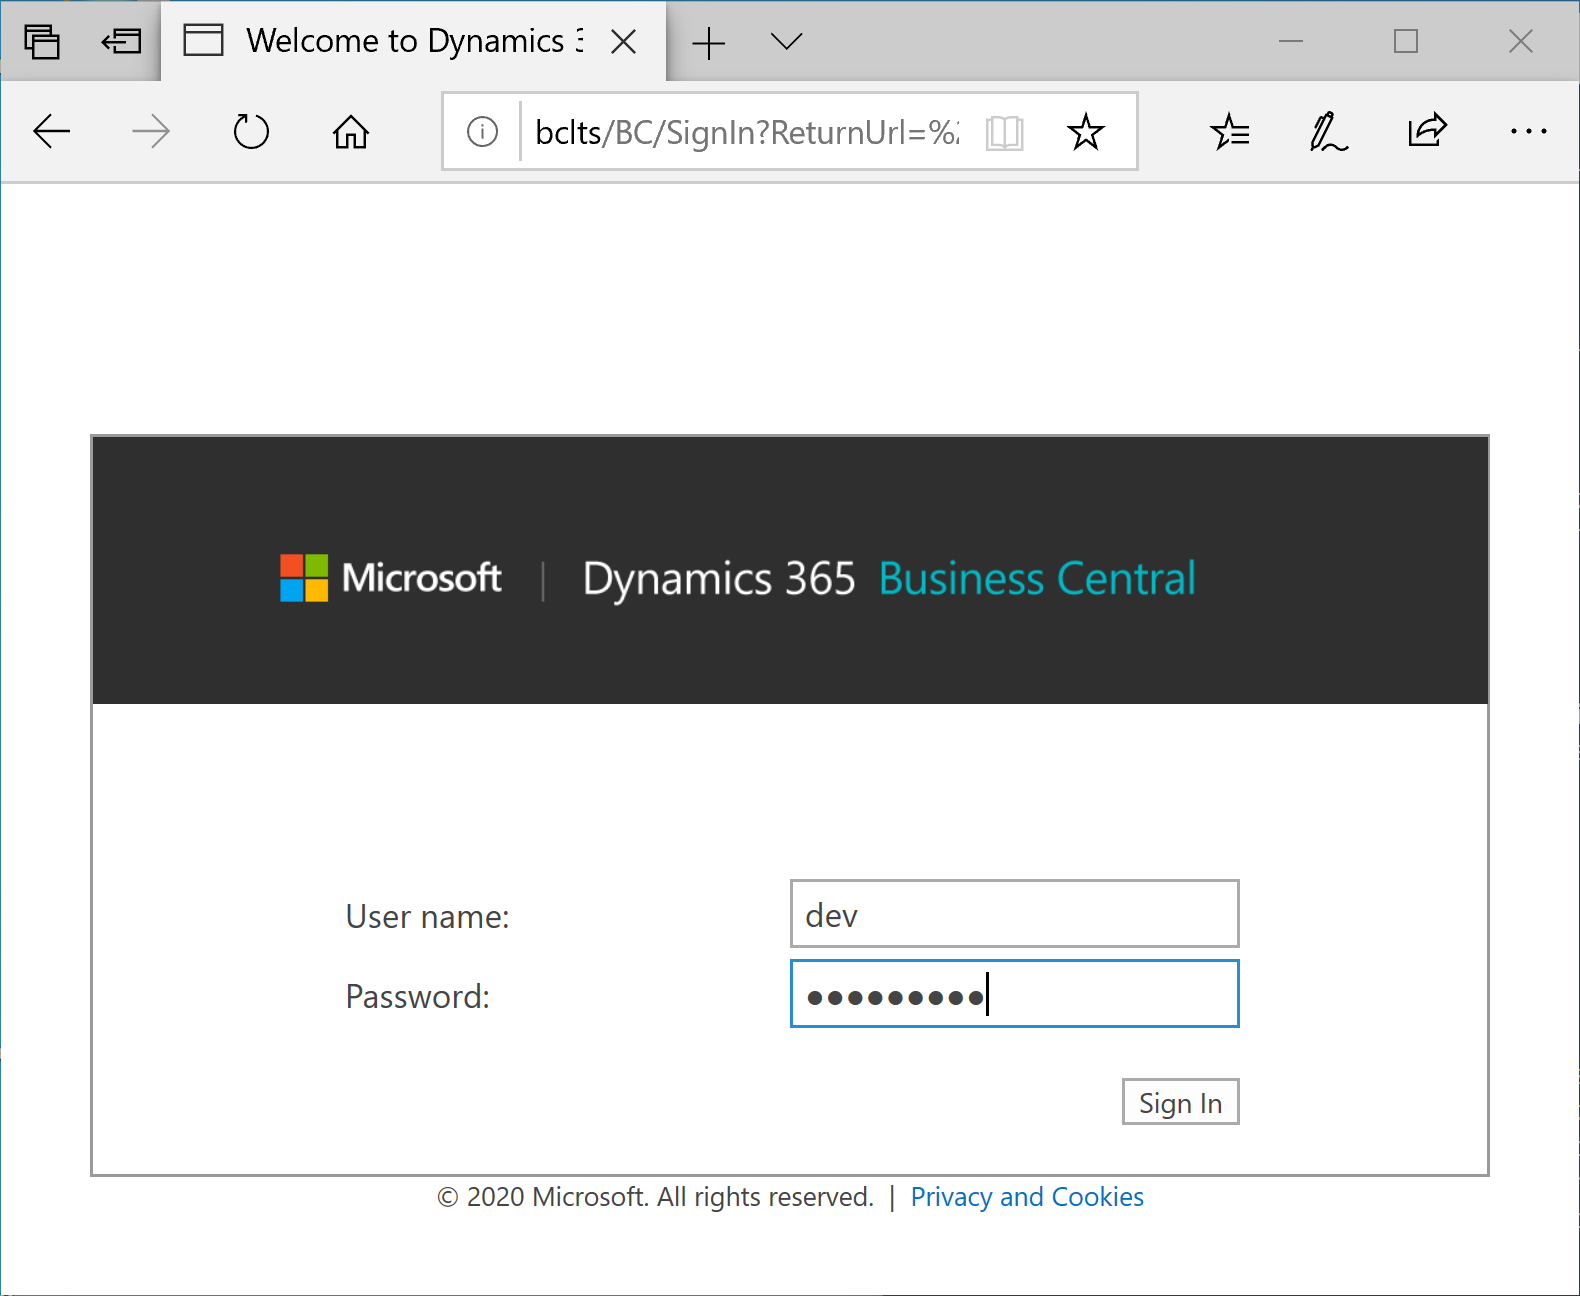
After entering the credentials, you should see something like this.
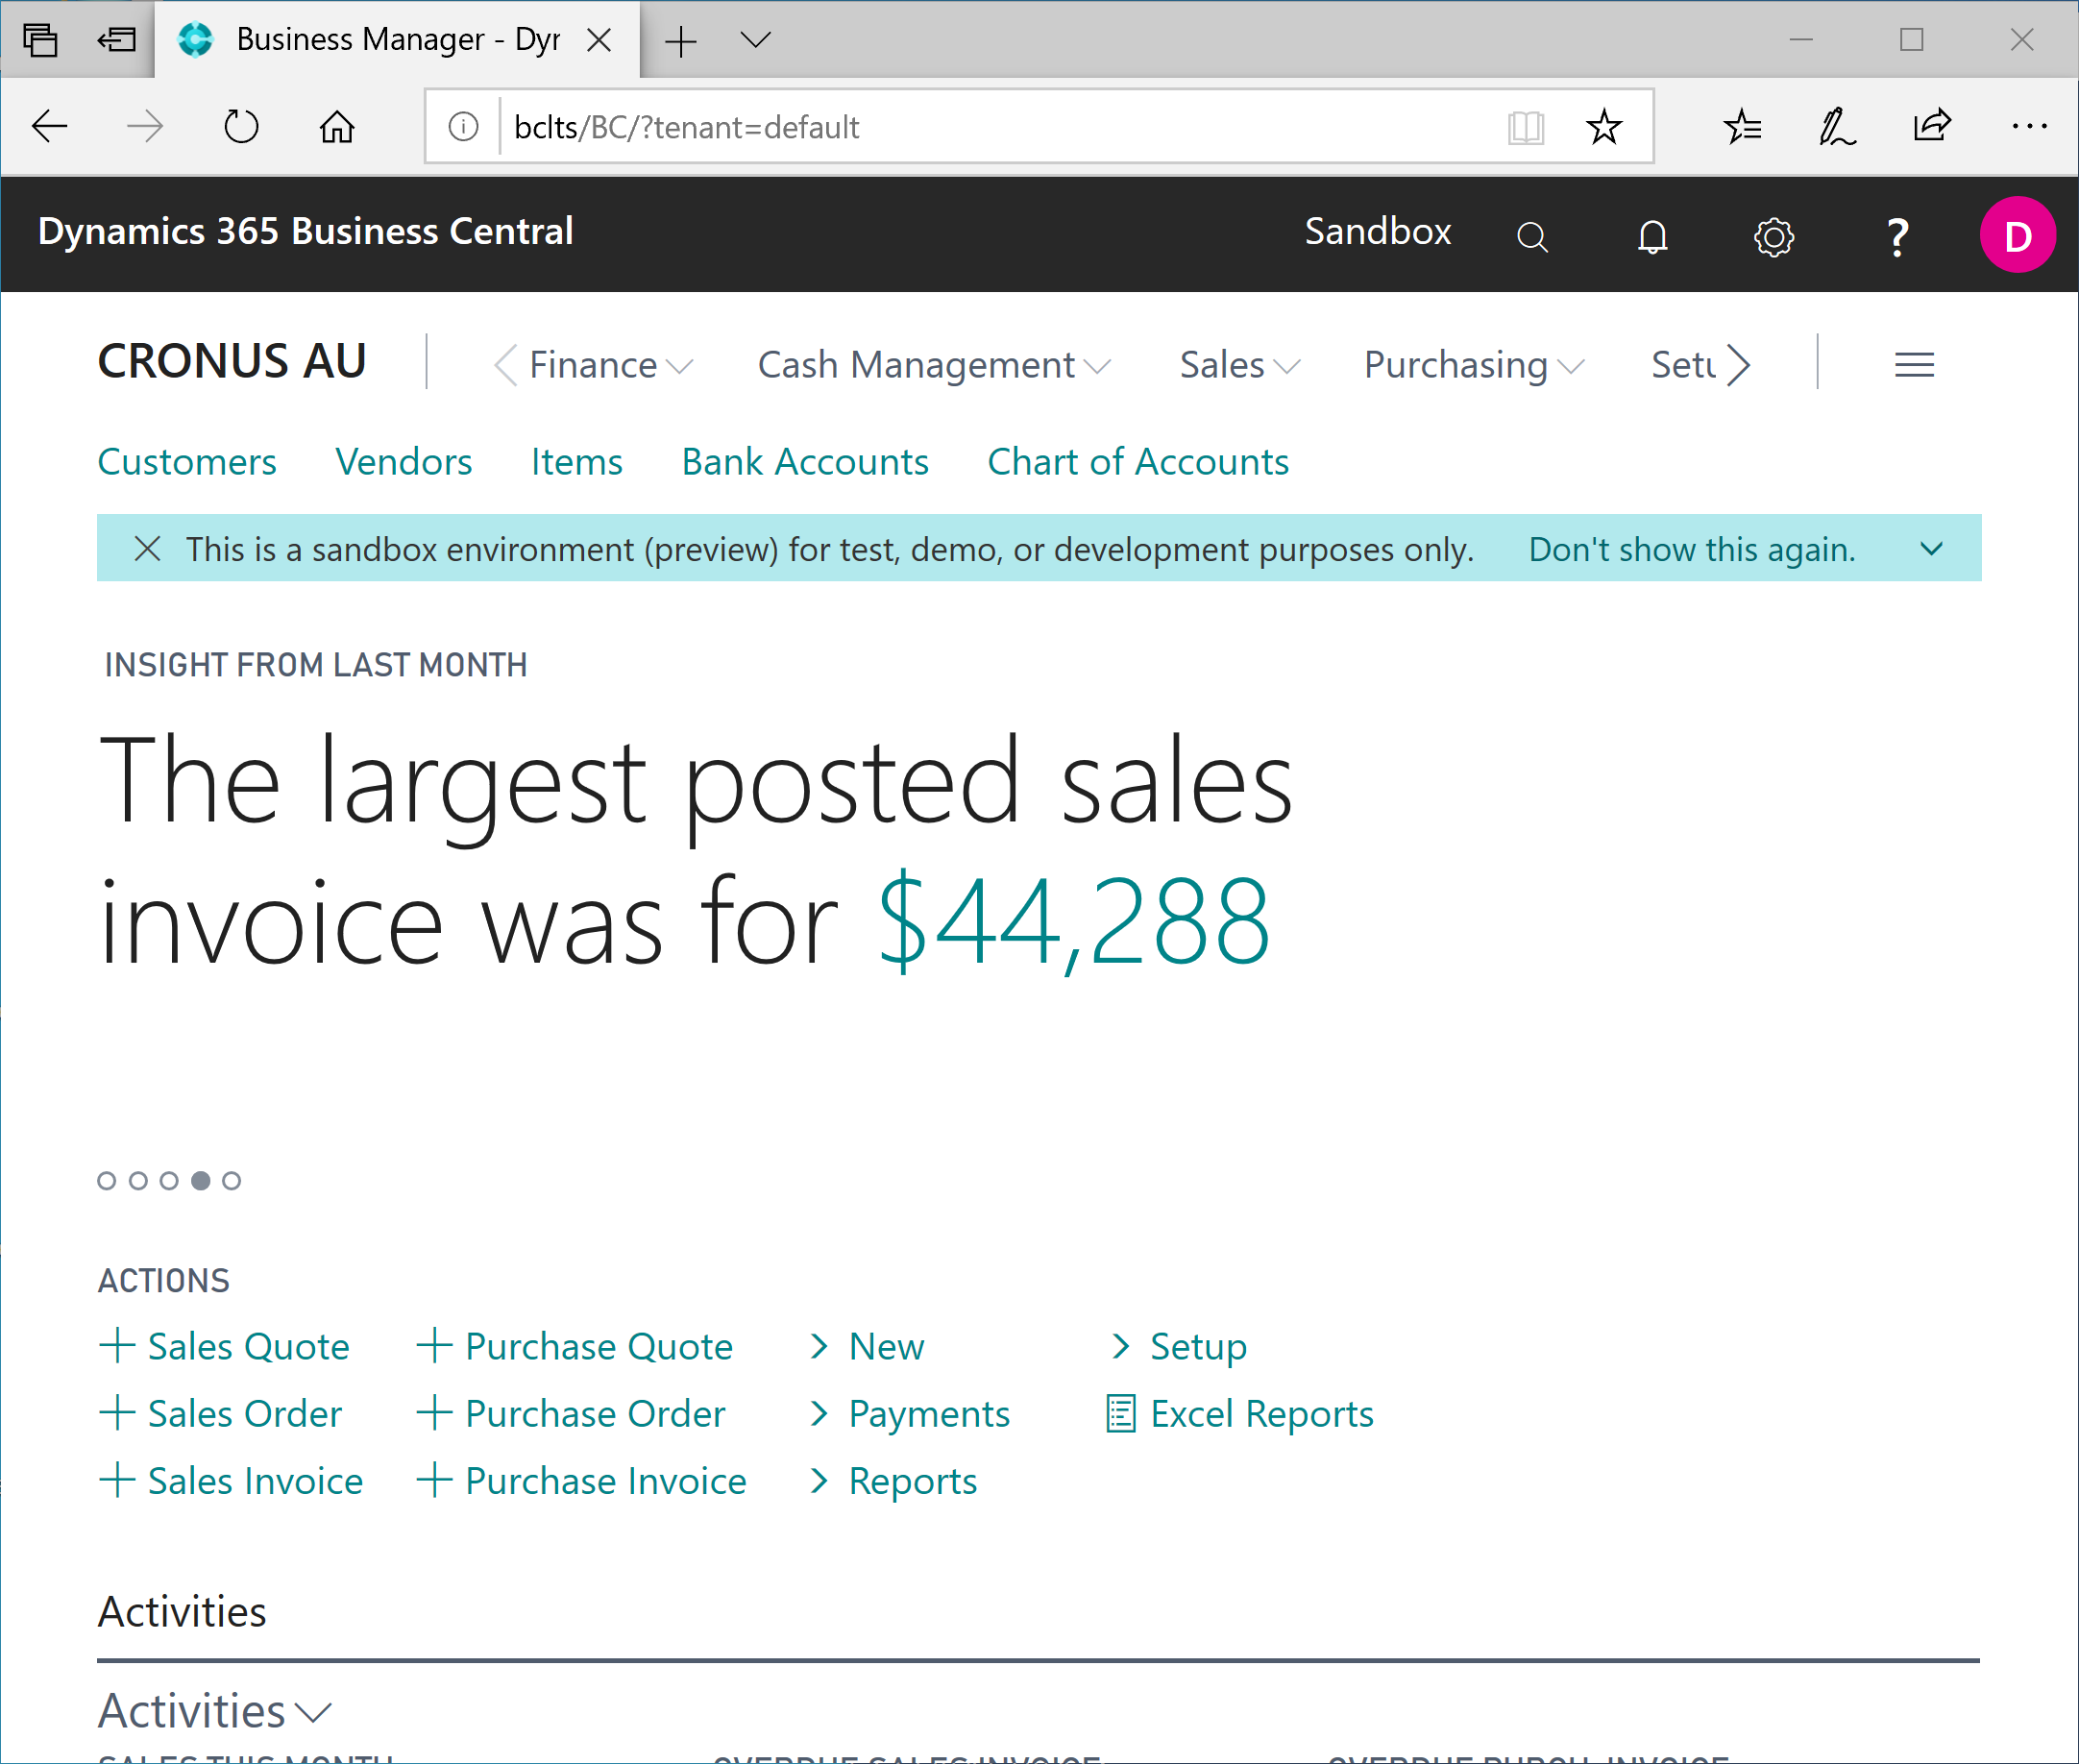
Congratulations, you’ve just created a working environment of the latest version of Business Central!
The beauty of using Docker is that no matter how creative you mess with the container, you can save your progress, delete the container, and spin up a new one in about 10 minutes! Once the images are downloaded to your machine, they’ll be used for your next container as long as you use the same BC Docker image tag.
Setting Up Visual Studio Code
Visual Studio Code is the most popular IDE for AL development and is required to go further.
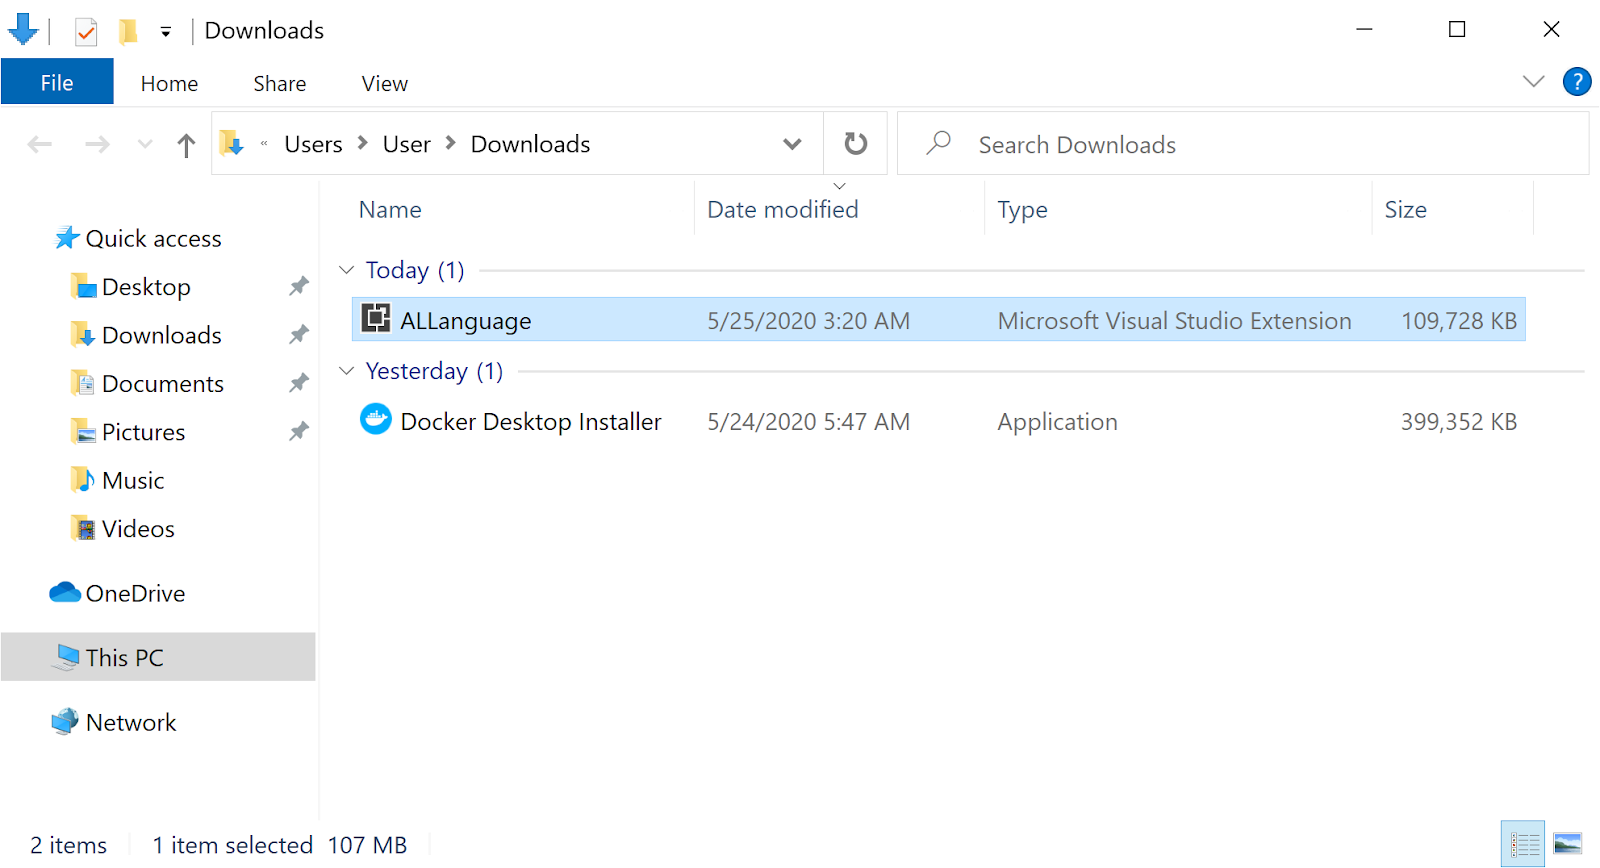
Download the vsix file using the address from your logs which contains the AL language version that matches the container. It’s http://bclts:8080/ALLanguage.vsix in my case.
When switching between the containers from different release waves, install the extension from the VSIX file that comes with the container if there are issues.
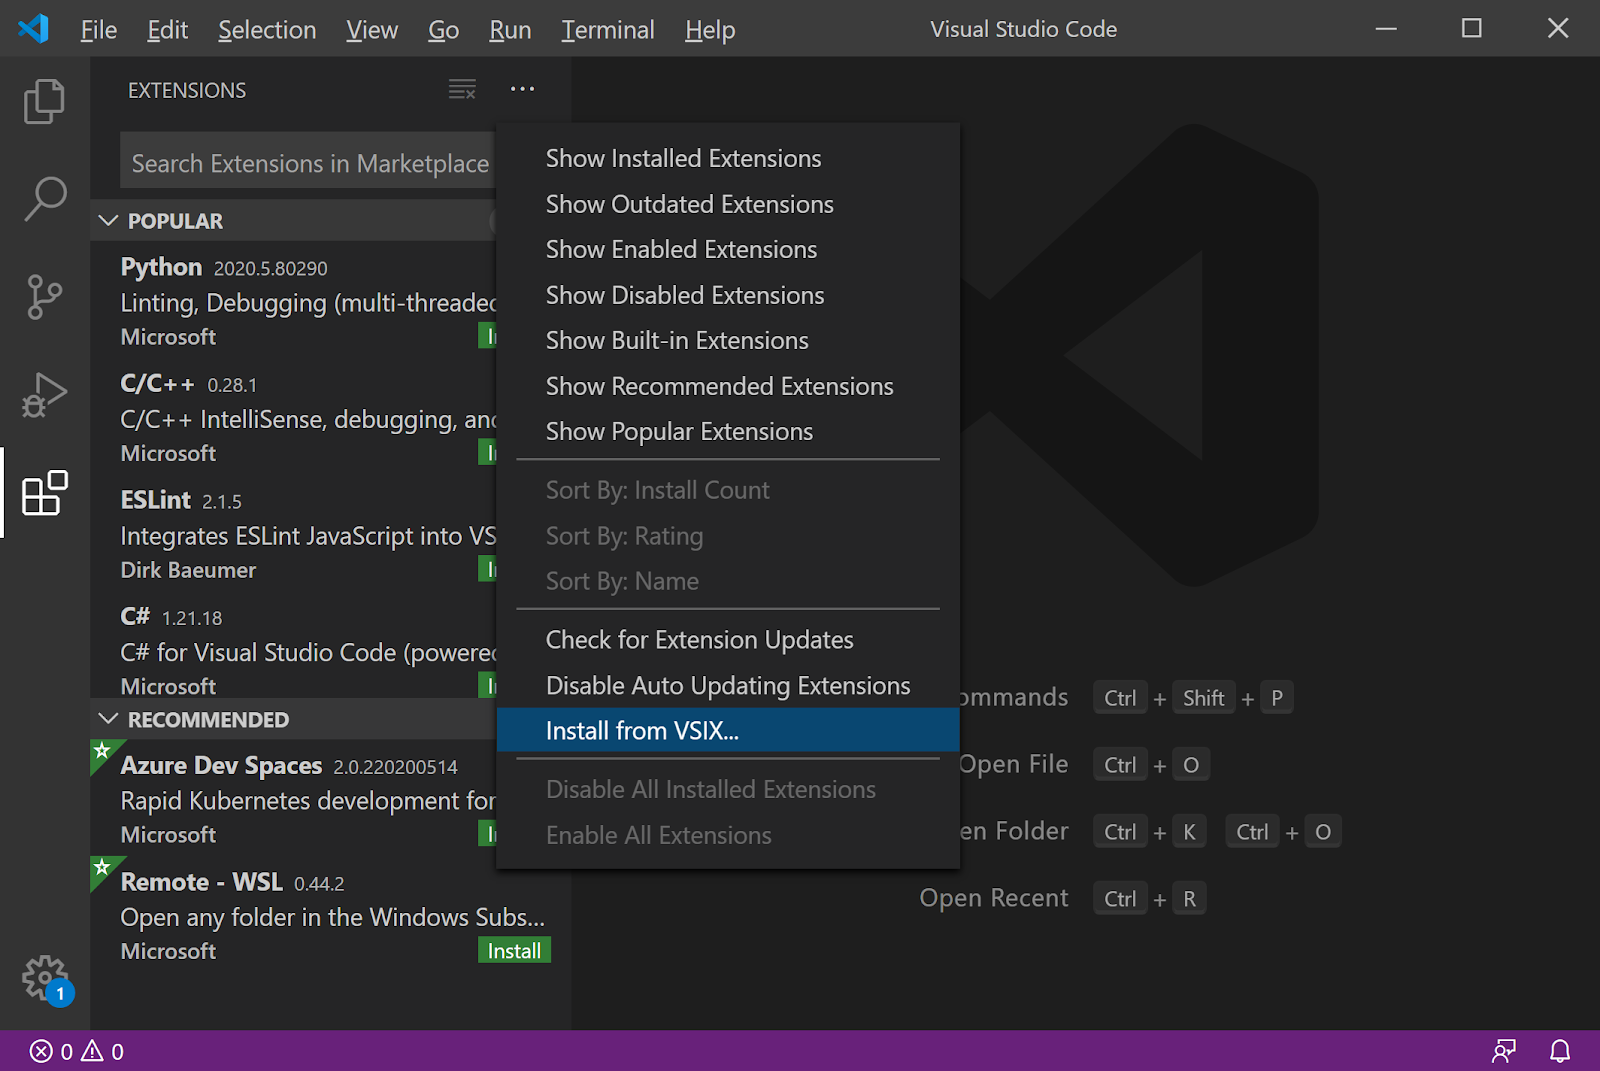
Then open VS Code, go to the Extensions tab and hit the Install from VSIX menu item, and select the downloaded file.
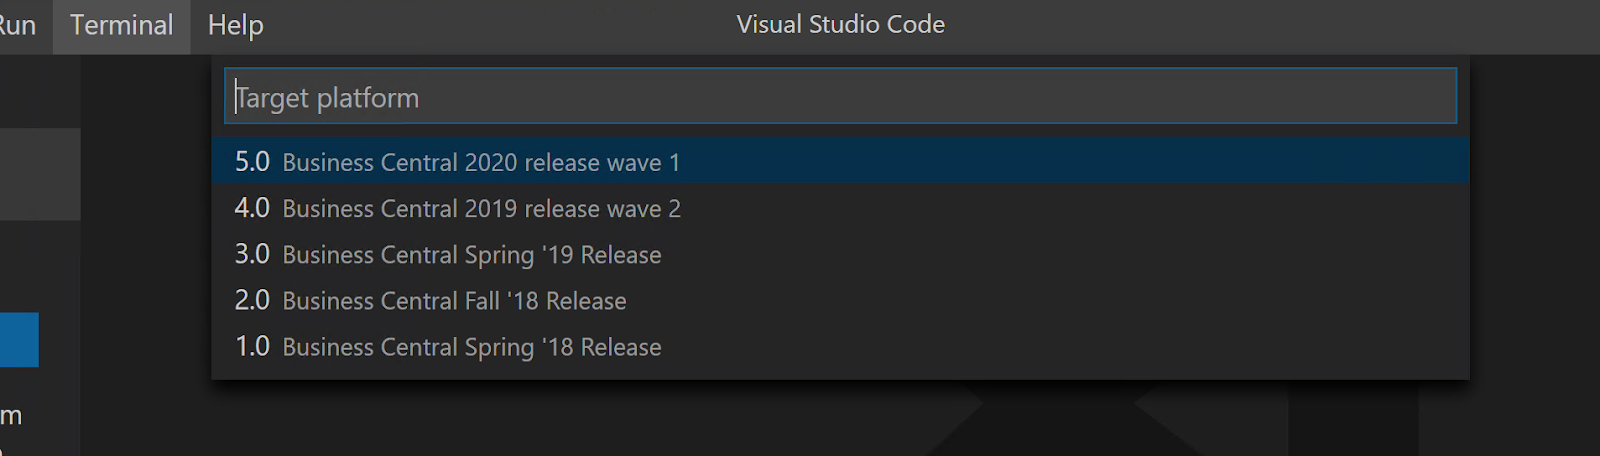
After the extension is installed, hit Alt+A, Alt+L to trigger the AL Go! command, specify a to be created project folder and which version to run.

Then select the latest platform.
After the project forlder opens up automatically, select Your own server as the server when the dialog pops up.
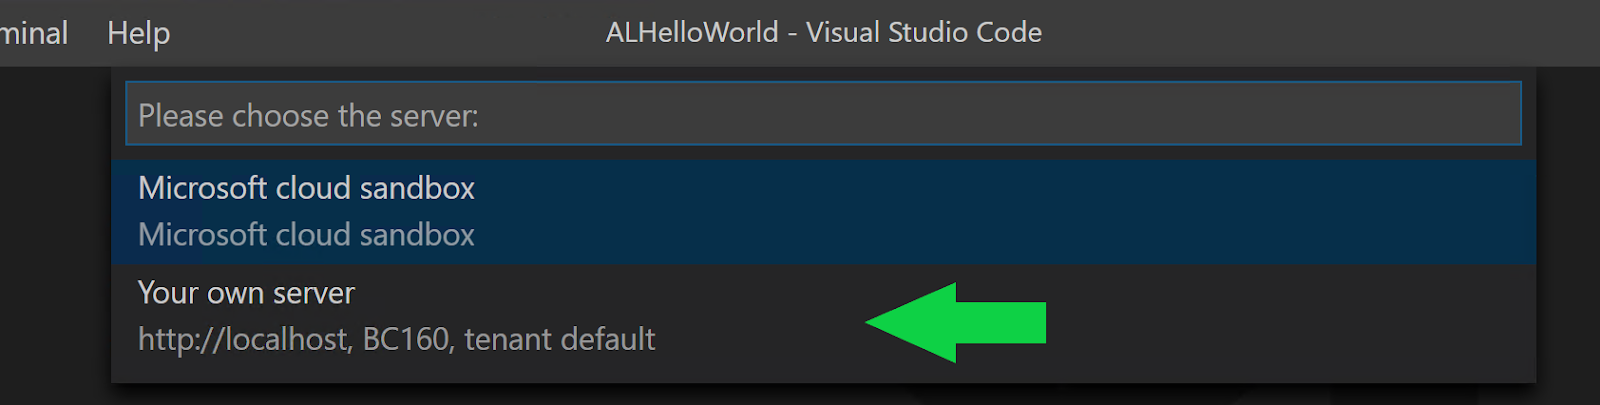
Next, escape from the server authentication prompt as we need to update the launch.json to point to our container instance.
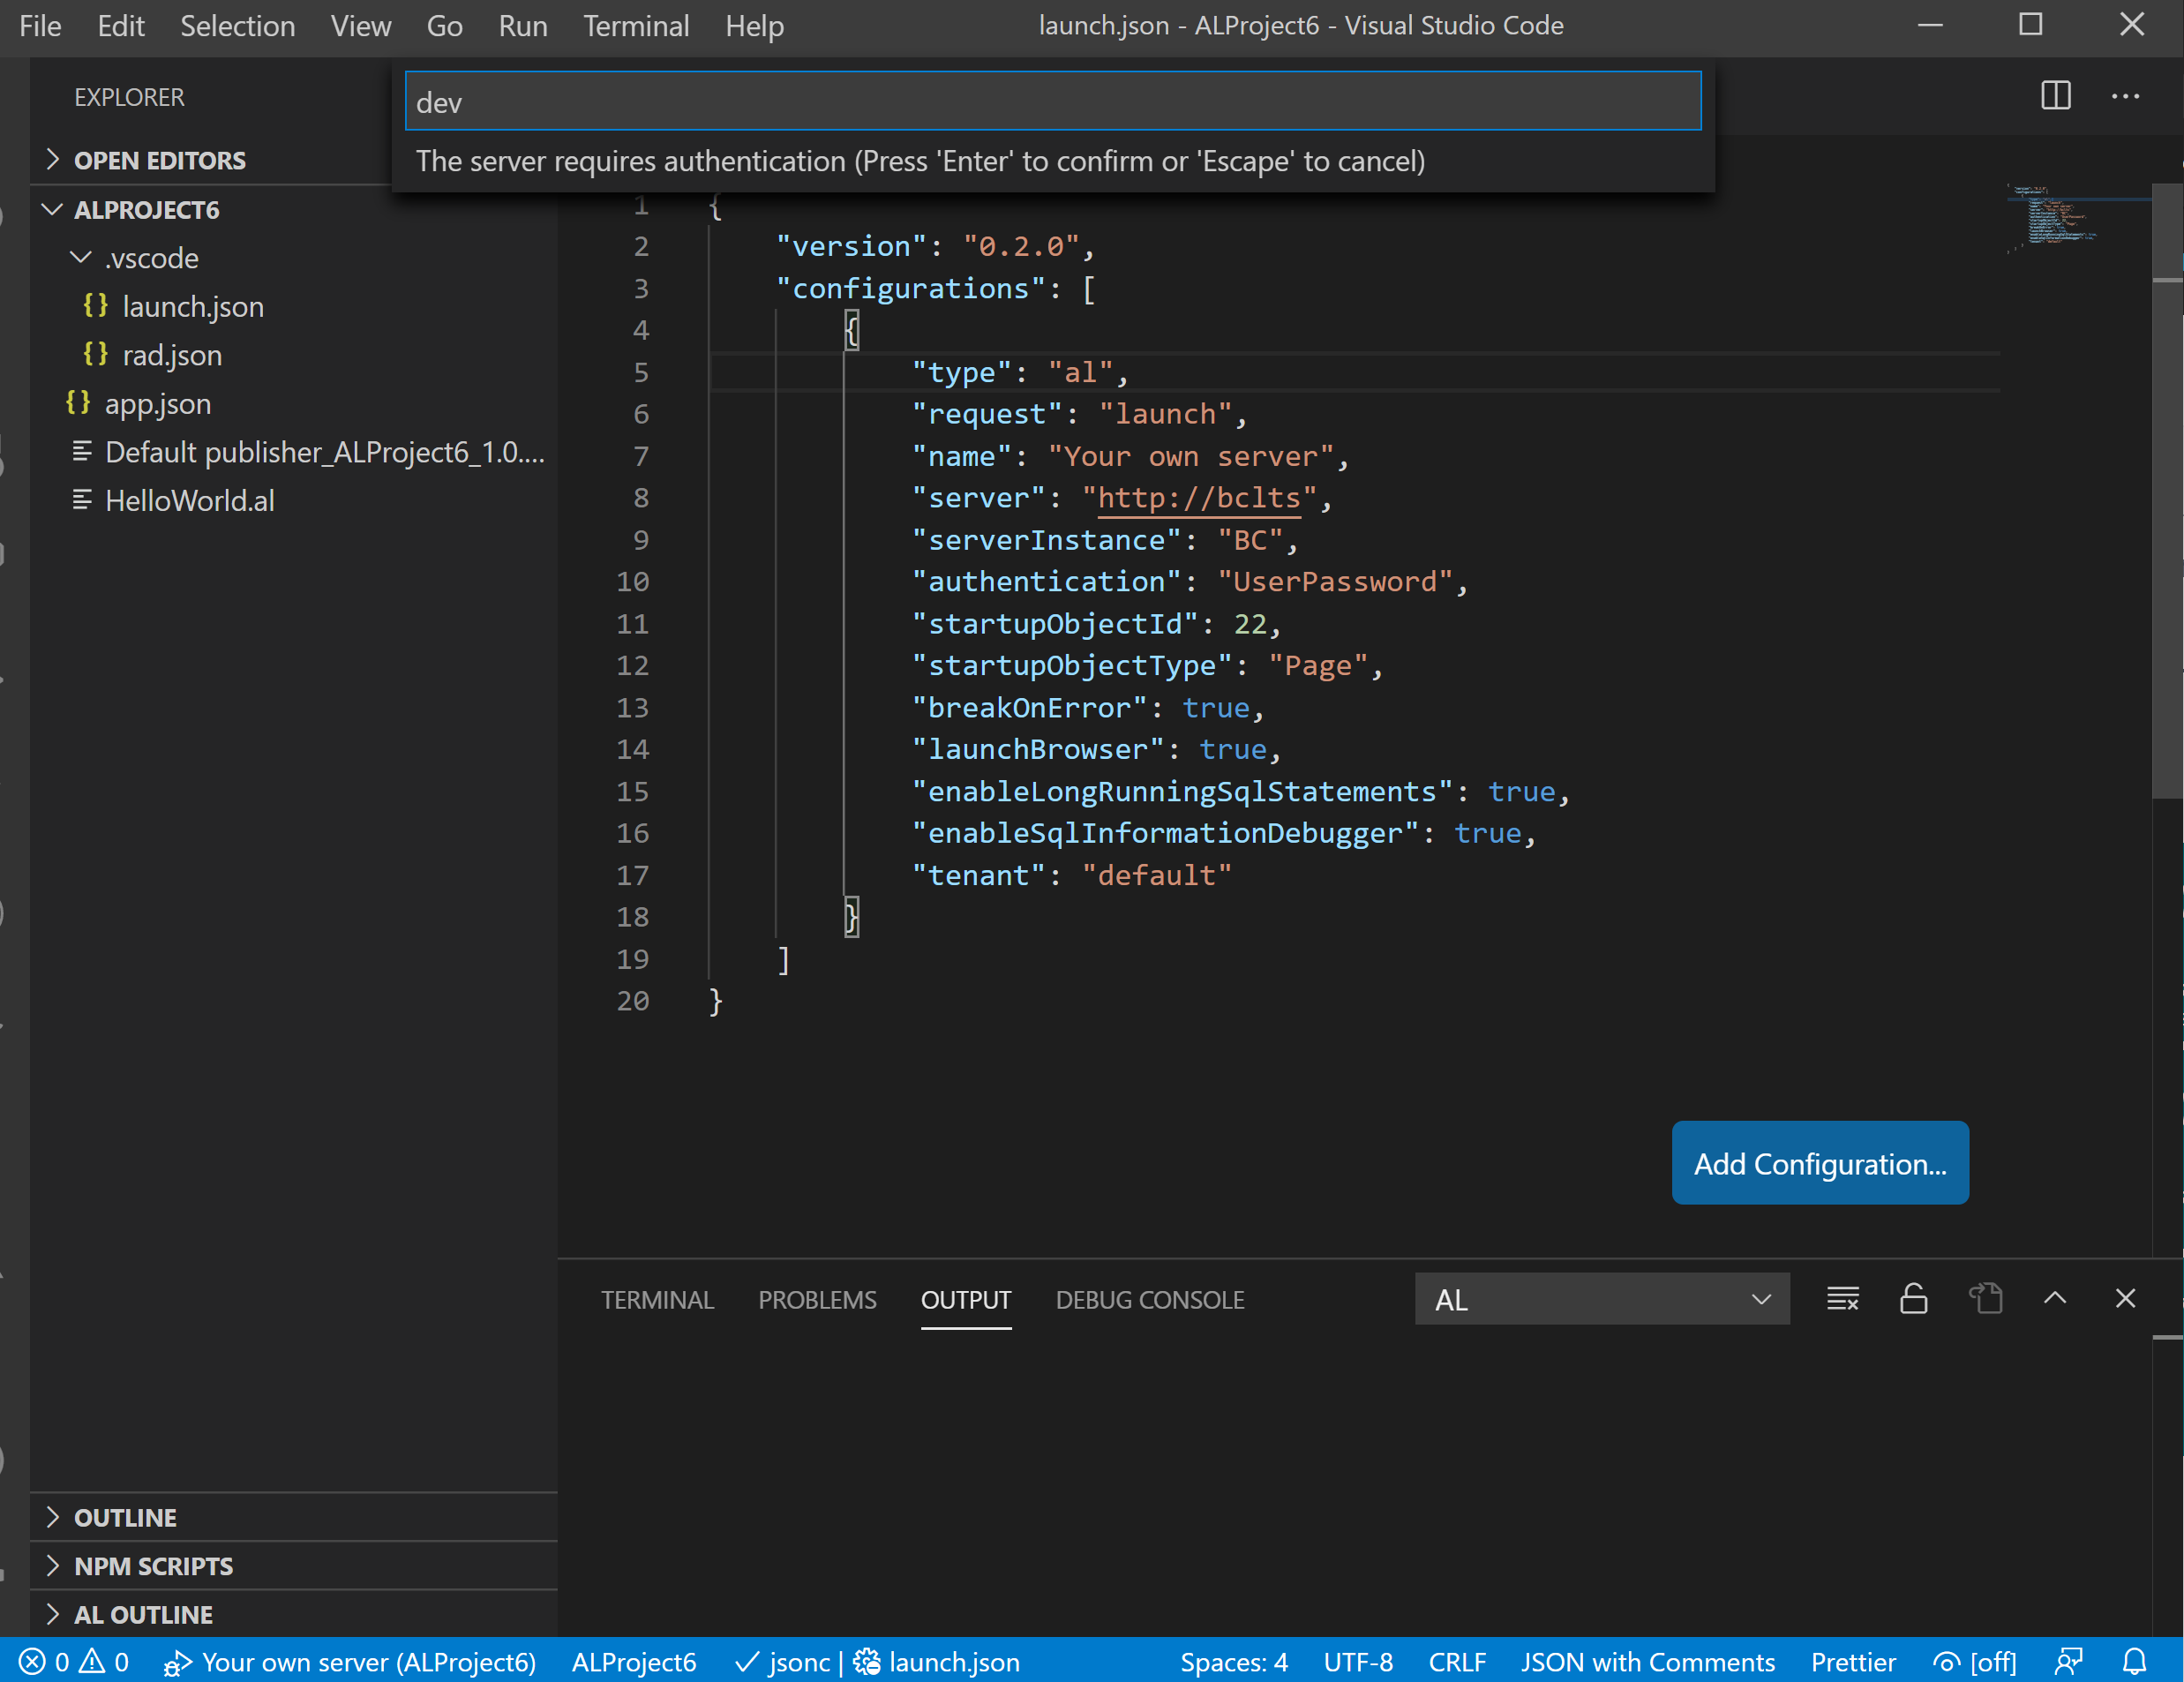
Now we need the container name that we specified before, and the Dev. Server Instance name that was mentioned in the logs. My result launch.json file looks as below.
{
    "version": "0.2.0",
    "configurations": [
        {
            "type": "al",
            "request": "launch",
            "name": "Your own server",
            "server": "http://bclts",
            "serverInstance": "BC",
            "authentication": "UserPassword",
            "startupObjectId": 22,
            "startupObjectType": "Page",
            "breakOnError": true,
            "launchBrowser": true,
            "enableLongRunningSqlStatements": true,
            "enableSqlInformationDebugger": true,
            "tenant": "default"
        }
    ]
}Publishing AL Extension
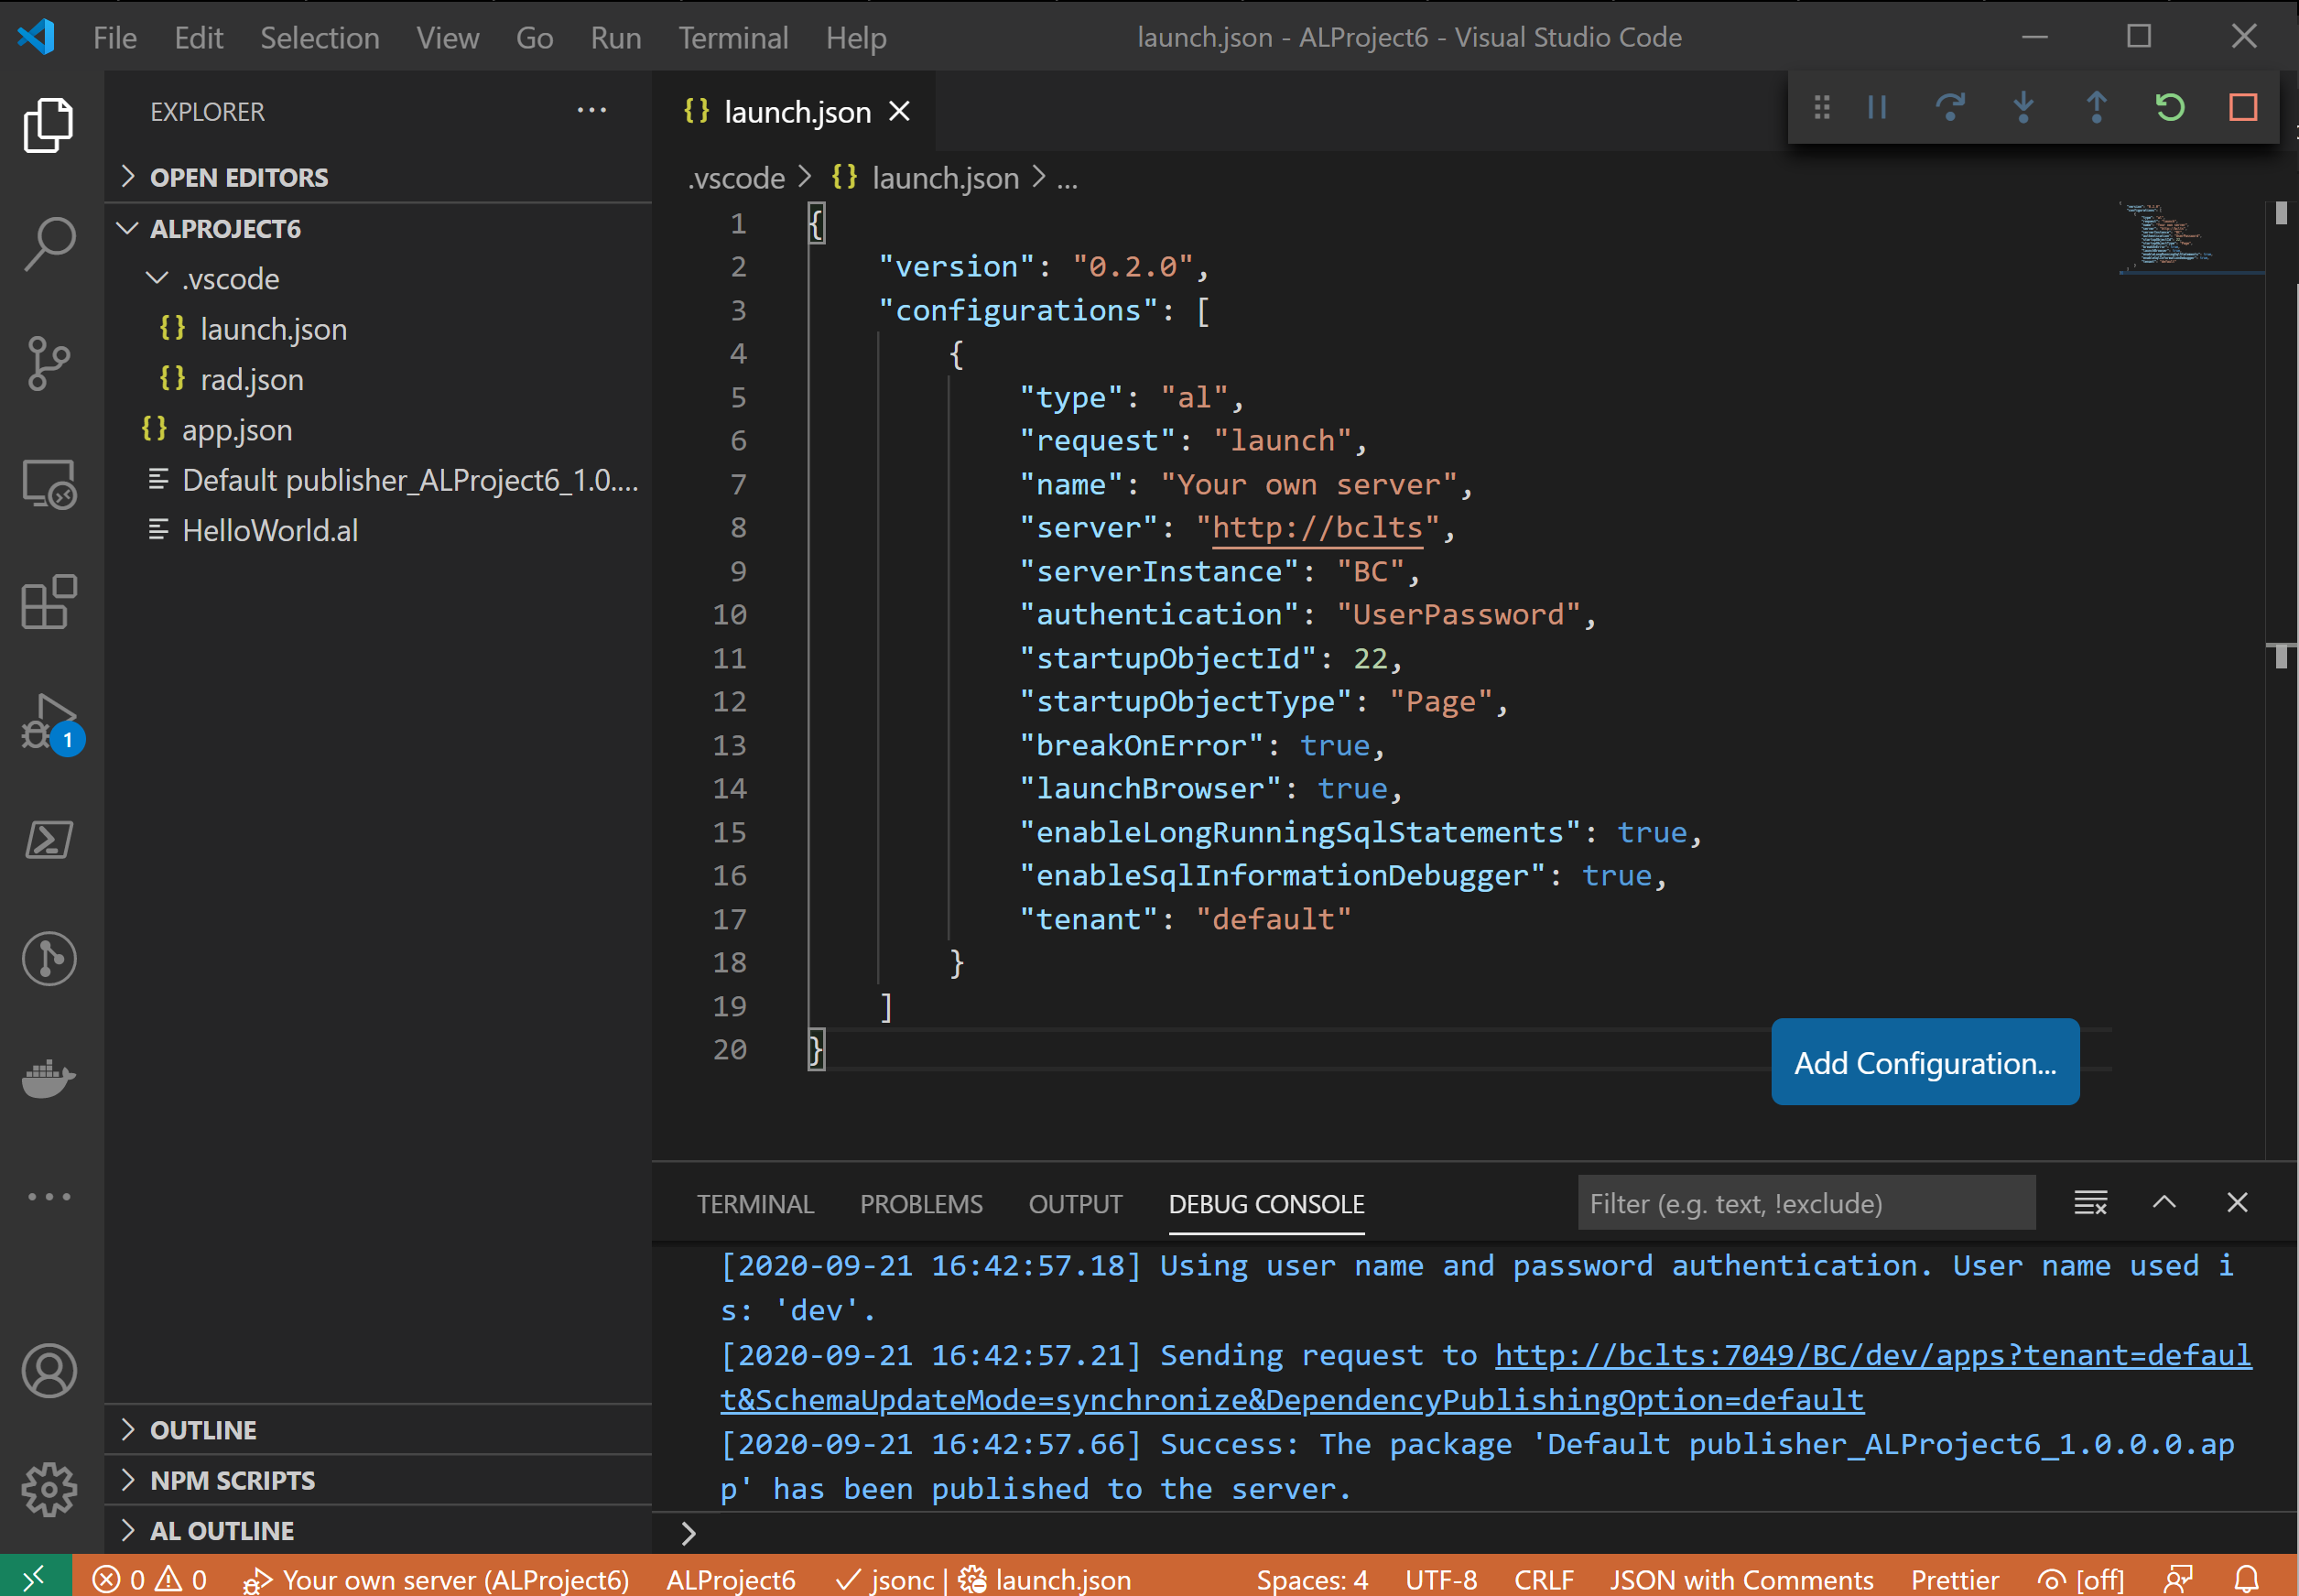
You might have noticed that the Hello World application is already there created for us. If you look at the HelloWorld.al file, it extends the Page 22 Customer List to display the "App published: Hello world" message. I don’t believe it will break the system, so let’s skip testing and just deploy it!
Now hit F5 and enter the container user credentials.
The below is a picture of Visual Studio Code in the Debugging mode that it switches to as a result of the previous action.
Now wait a moment and the Web Client should pop up, and the Customer List page should open. And when it opens, we can see our powerful extension at work!

Woo-hoo, finally! Now that we have everything working, don't be shy, apply your creativity and break things! That's usually the outcome of trying to learn something new for me.
Summary
If your company is running the NAV 2016 or later version, there is probably a Docker image for you to play with. Many of us are running a customized version of NAV/BC, and refreshing (or if you aim for the next version, updating) the knowledge about how the standard logic works adds to the quality of what you're doing.
Next time you start a new project, try using a BC Docker image to do some testing on the specific application version to identify the gaps in the standard functionality first. Then do some prototyping to see how it might work out for you (without the rest of customization if possible). And remember, if you break the environment, you'll get a shiny clean one in 10 minutes! Just remove the container and create a new one.
I hope you enjoyed reading this article and learned a couple of new tricks. Thank you for reading and until next time!
Additional Tips
Here are some useful commands for working with containers:
docker ps # check running containers
docker ps -a # get all containers on the machine
docker stop <container-name> # stop a container, saves memory if not using it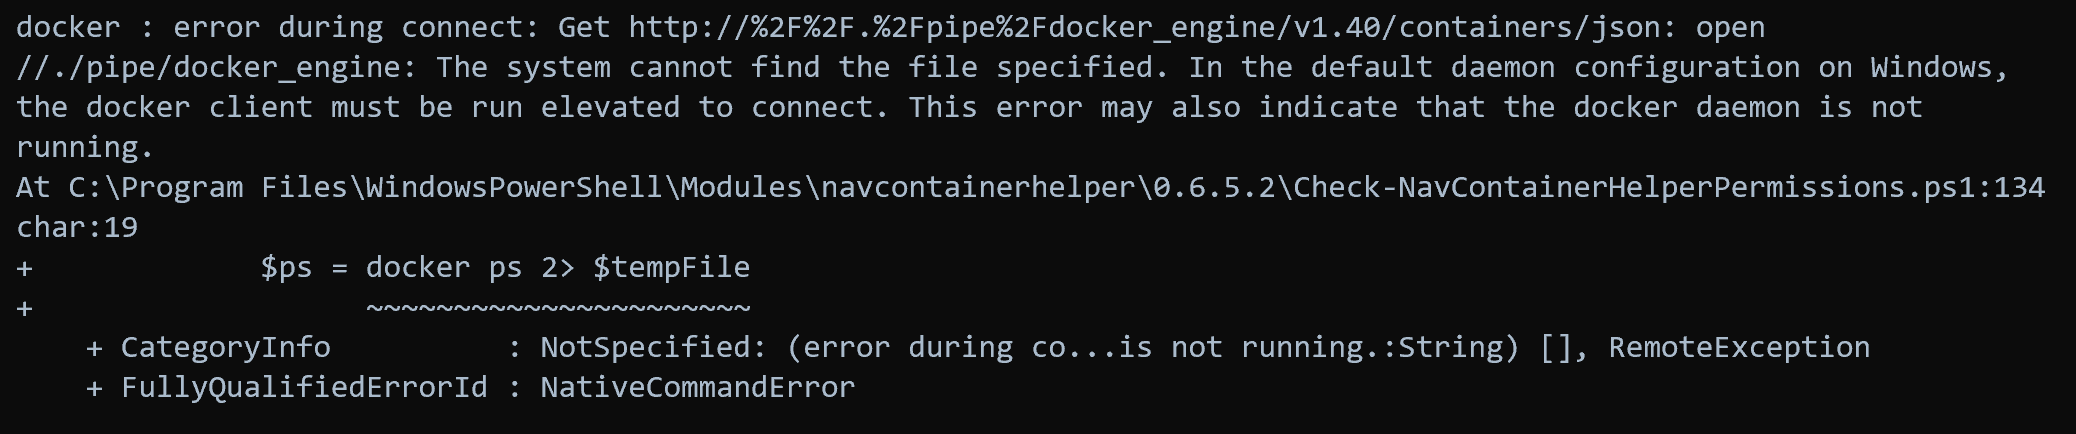
docker start <container-name> # start a stopped (status Exited) containerGetting errors similar to the below would mean Docker Desktop is not running.
Without a good understanding of the BC Docker environment, we probably shouldn’t go much further with the docker commands on BC containers. It’s always best to use the available in the BcContainerHelper commands. The wrappers for the commands above are as follows:
Get-BCContainers # get all BC containers on the machine
Stop-BCContainer <container-name>
Start-BCContainer <container-name> # also provides the start-up logs and BC container specific information like the vsix file location for AL development
By the way, the Get-BCContainers command is an alias of the Get-NavContainers command and they can be used interchangeably. Same applies for the rest of the commands.
Once you've finished with a container, just remove it.
Remove-BCContainer <container-name> # takes care of the Desktop shortcusts too!In case there isn’t a method for you and you have a good idea, the NavContainerHelper (still has the original name) repository is open to submission of pull requests and contributions!
Additional Links
If you’re new to AL, Getting Started with AL is a great place to look at for further learning AL language and extending Business Central functionality.
I haven’t tried it yet but AL Object Designer looks very promising if you’re looking for a C/SIDE-like experience, and it comes with some extra nice features.
More information on Docker is available at the website https://docs.docker.com/desktop/.
For more information on BC Container Helper, Freddy’s blog is where heaps of it can be found.
In case a BC version 14 or an older NAV version is required, we might need to still need to follow the traditional path and use docker images with NavContainerHelper. The full list of image tags and other information is available at https://hub.docker.com/_/microsoft-businesscentral-onprem.
Dynamics NAV 2016 to 2018 images can be found at https://hub.docker.com/r/microsoft/dynamics-nav. The container creation parameters might need to be different for them. Here is a script that I used last time to create a BC 14 container:
$navImage = "mcr.microsoft.com/businesscentral/onprem:14.11.41204.0-au"
$containerName = "bc14dev"
$licenseFile = (Join-Path $PSScriptRoot "\license.flf")
$authenticationType = 'UserPassword'
Write-Host "*** Starting $containerName container creation ***" -ForegroundColor Yellow
if ($authenticationType -ne 'Windows'){
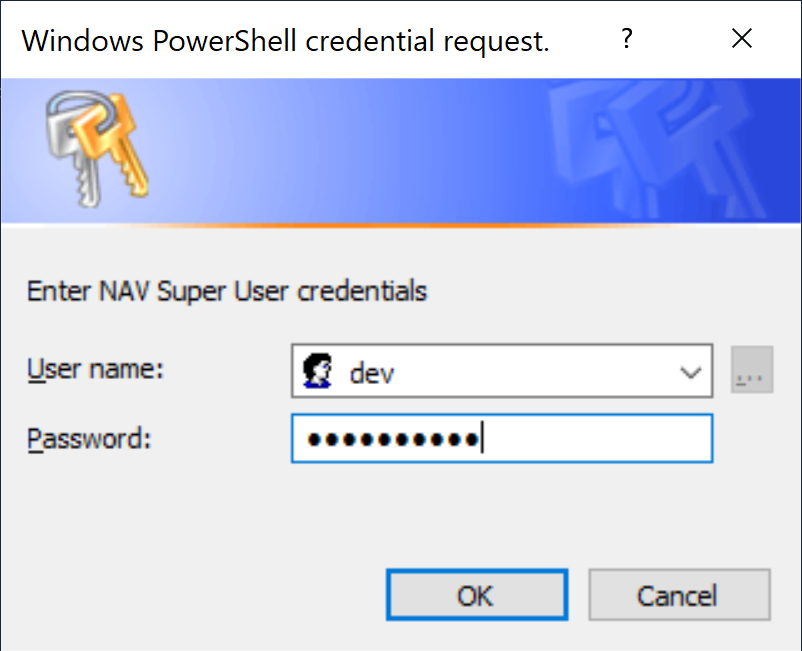
$credential = get-credential -Message "Enter NAV Super User credentials"
}
Measure-command {
New-NavContainer -accept_eula `
-accept_outdated `
-containerName $containerName `
-imageName $navImage `
-credential $credential `
-memoryLimit 10G `
-includeCSide `
-doNotExportObjectsToText `
-alwaysPull `
-updateHosts $true `
-auth $authenticationType `
-myScripts @() `
-navDvdPath "" `
-includeTestToolkit `
-doNotCheckHealth
}
IF($licenseFile -ne ""){
Import-NavContainerLicense -containerName $containerName -licenseFile $licenceFile
}
Write-Host "*** $containerName container creation completed ***" -ForegroundColor GreenNotice it has the -includeCSide parameter to include our beloved C/SIDE development environment. It also has the -includeTestToolkit to exercise automated unit testing skills. Feel free to try and figure our the parameter set that suits your needs.
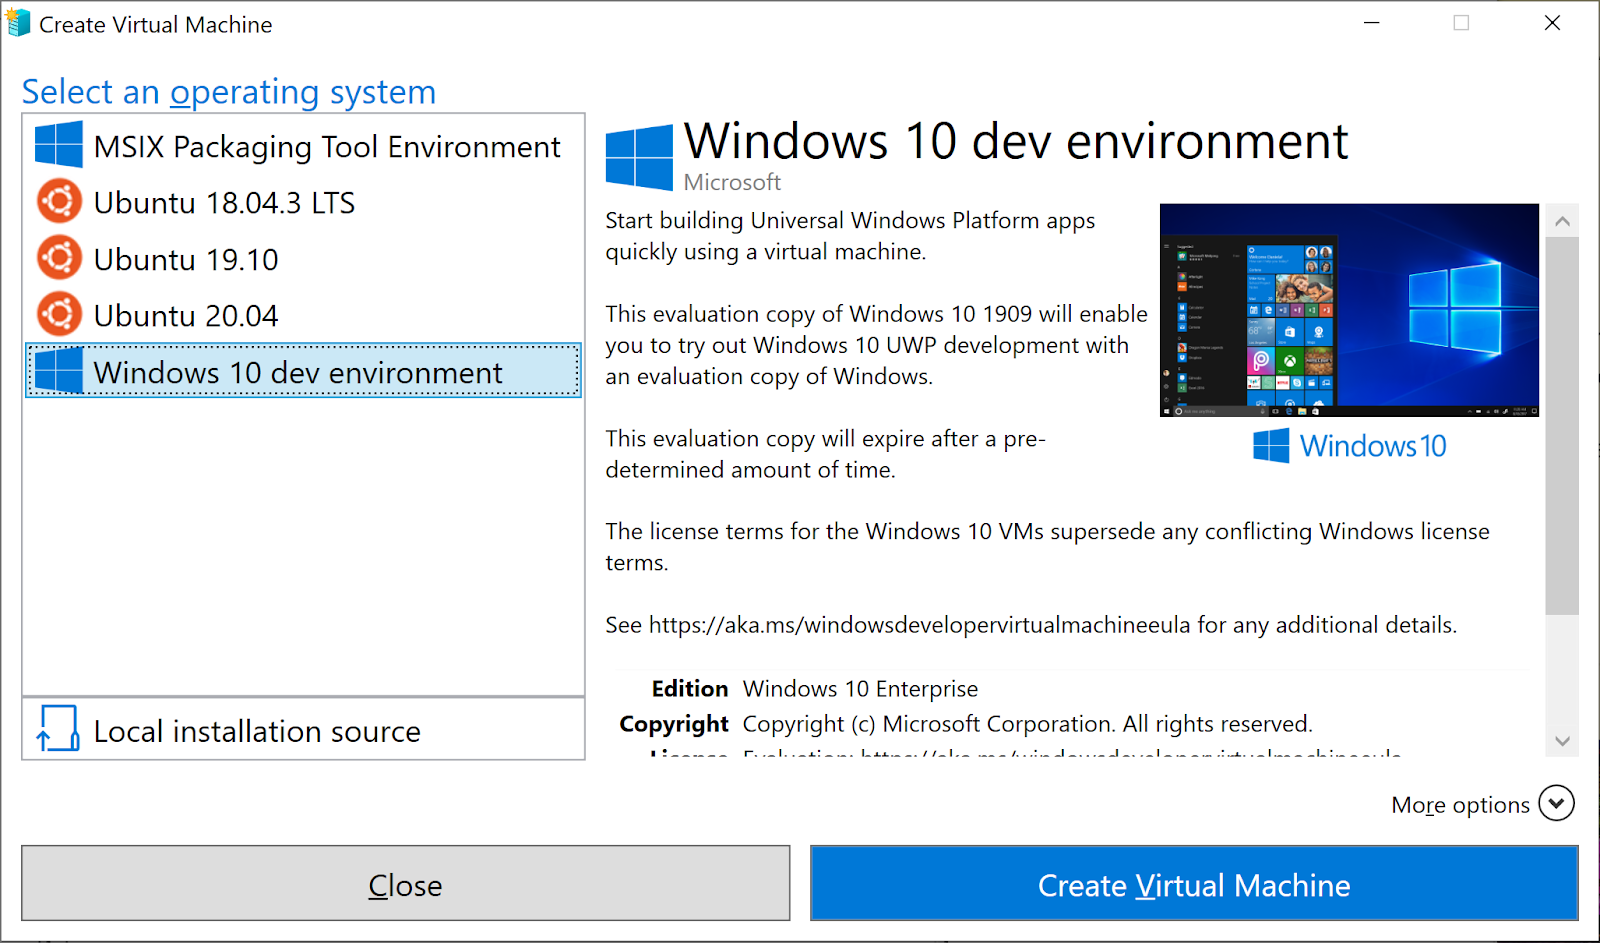
Extra Steps to Set Up the Windows 10 Dev Environment VM
The Windows 10 VM for this walkthrough was created using the Quick Create action in Hyper-V Manager.
Then the image (16.10 GB) is downloaded and the machine is created.
After that, turn it off and enable nested virtualization for it https://docs.microsoft.com/en-us/virtualization/hyper-v-on-windows/user-guide/nested-virtualization by running the following command as Administrator:
Set-VMProcessor -VMName <VMName> -ExposeVirtualizationExtensions $trueSet the amount of memory to at least 8 GB. It should perform better with 10 GB+ of RAM.